spring是一个轻量级的企业开发一站式解决方案框架。spring使用简单的POJO来进行开发,每一个被spring管理的java对象,被称为bean。而spring提供了ioc容器来创建和维护bean之间的依赖关系。
IOC与DI
插自官网的一段介绍:
在spring中,IOC(控制反转)与DI(依赖注入)是同等的概念。控制反转是通过依赖注入来实现的。所谓的依赖注入是指,被spring管理的bean,他们初始化以及之间依赖关系,由spring容器来生产bean,以及管理维护他们之间存在的依赖,以达到解耦的目的。简单的说,spring的ioc容器负责创建bean,并且将bean注入到另一个存在依赖关系的bean中。
spring可以通过xml配置,以及注解方式。无论哪一种方式,springioc容器都对它们进行解析,然后bean初始化,配置,依赖管理。现在大部分公司都是使用注解方式。
注解配置
声明bean的注解
- @Controller:用于springmvc的表现层。
- @Service:用于业务层,也就是我们写的service
- @Repository:用于数据访问层,就是我们写的dao
- @Component:本身没有实际的意思,只是标注为bean。也就是我们如果将一个Java对象交给spring容器管理,除了以上三种外,还可以使用这种通用的组件
除了以上四种,还存在@Configuration与@Bean结合使用的方式。
注入bean的注解
- @Autowired:常用,应用于属性或者属性的setter方法。属于spring提供的注解
- @Inject:JSR-330提供的注解,不常用
- @Resource:JSR-250提供的注解,常用
声明bean的注解与注入bean的注解结合使用案例:
一,引入依赖:
    <dependency>
        <groupId>org.springframework</groupId>
        <artifactId>spring-context</artifactId>
        <version>5.0.5.RELEASE</version>
    </dependency>
二,创建HelloRepository:
@Repository
public class HelloRepository {
    public void sayHello(String content){
        System.out.println(" sayHello : " + content);
    }
}
@Repository表示将HelloRepository的实例化交给spring容器管理
HelloService:
@Service
public class HelloService {
    @Autowired
    private HelloRepository helloRepository;
    public void sayHello(String content){
        helloRepository.sayHello(content);
    }
}
@Service表示将HelloService交给spring容器管理
@Autowired表示将HelloRepository依赖给注入进来,也就是将上边创建好的HelloRepository给注入。
三,创建AppConfig:
@ComponentScan("com.spring.*")
public class AppConfig {
}
@ComponentScan("com.spring.*")表示以com.spring为根包向下扫描,将扫到@Controller,@Service,@Repository,@Component注解的类,都交给spring容器管理注册为bean
四,使用AnnotationConfigApplicationContext容器:
public class SpringDemoMain {
    public static void main(String[] args) {
        ApplicationContext ac = new AnnotationConfigApplicationContext(AppConfig.class);
        HelloService bean = ac.getBean(HelloService.class);
        bean.sayHello("你好啊");
    }
}
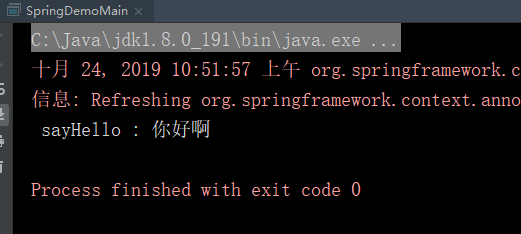
运行后输出:
我们还可使用@Configuration与@Bean结合方式创建bean
一,将@Service,@Repository去掉,修改AppConfig类:
@ComponentScan("com.spring.*")
@Configuration
public class AppConfig {

    @Bean
    public HelloService helloService(){
        return new HelloService();
    }

    @Bean
    public HelloRepository helloRepository(){
        return new HelloRepository();
    }

}
@Configuration:表示这个是个配置类
@Bean:表示当前声明方法返回一个bean,交给spring管理。
二,运行SpringDemoMain的main方法,输出:
效果是一样的。springioc容器自动帮我们创建并且维护各个bean之间的依赖关系。
beab的Scope
scope在spring中描述如何新建bean的实例,准确的说是描述bean的作用域。scope有以下几个常用的值
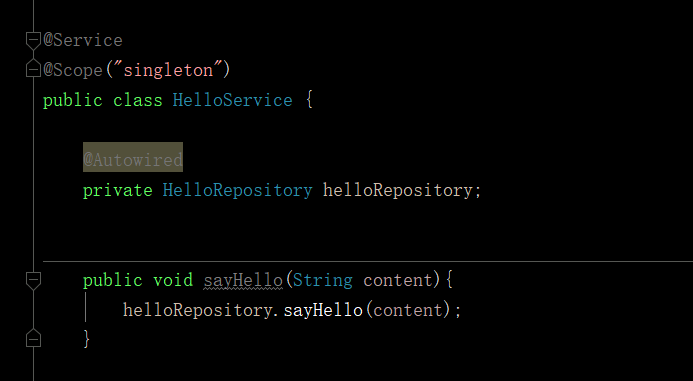
- singleton:默认配置。单例模式,表示一个spring容器中只能有一个bean的实例
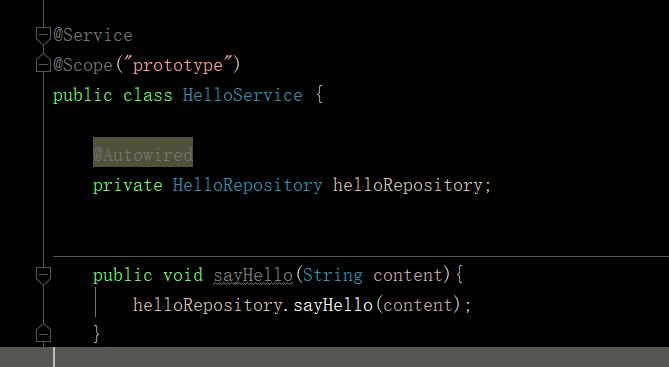
- prototype:允许每次使用的时候,都新建一个新的bean
- request:表示web项目中,每次http request都新建一个bean
- session:表示web项目中,每次http session都新建一个bean
1,看singleton例子:
最后输出:
2,看prototype例子:
最后输出:
beab的生命周期回调
在某些业务下,我们也许会有这样的需求,在bean创建或者销毁做一些有必要的任务。spring提供了对bean生命周期操作的支持:
- @PostConstruct ,@PreDestroy方式
1)@PostConstruct表示bean构造器完成之后执行的方法。使用方式如下:
 @PostConstruct
public void init(){
    System.out.println("PostConstruct..............");
}
2)@PreDestroy表示bean销毁之前执行。使用方式如下:
@PreDestroy
public void destroy(){
    System.out.println("PreDestroy..............");
}
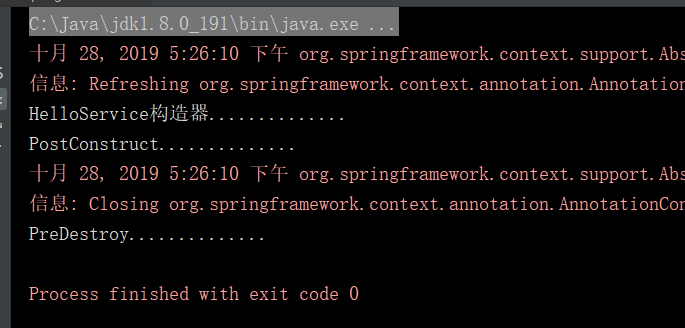
以上代码的例子:
最后输出:
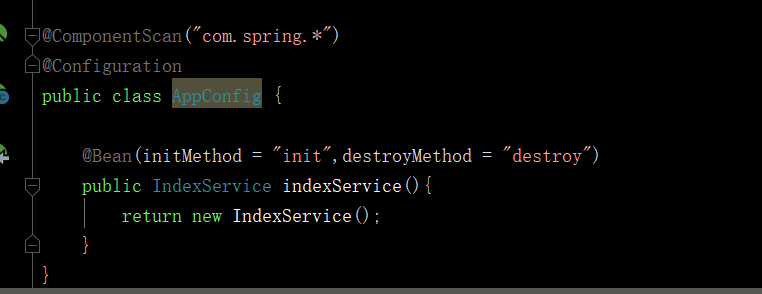
- @bean的initMethod和destroyMethod方式
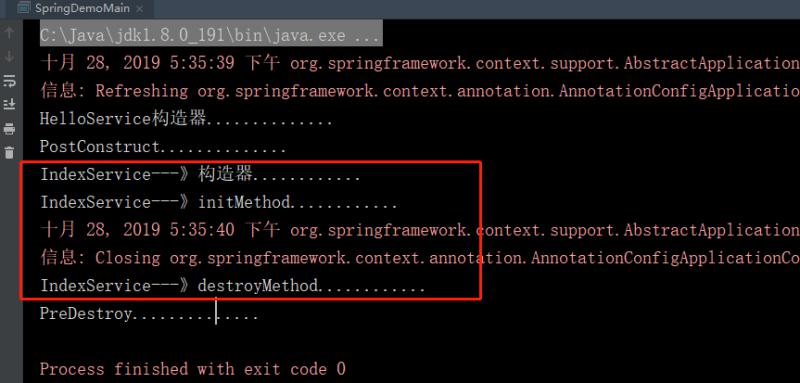
1)initMethod:指定bean的initMethod方法在构造器之后执行
2)destroyMethod:指定bean的destroyMethod方法在销毁之前执行
例子:
IndexService.class
AppConfig.class
public class SpringDemoMain {
    public static void main(String[] args) {
        ApplicationContext ac = new AnnotationConfigApplicationContext(AppConfig.class);
        IndexService bean = ac.getBean(IndexService.class);
        ((AnnotationConfigApplicationContext) ac).close();
    }
}
最后输出:
spring事件(Application Event)
spring的事件为bean与bean之间提供了消息通信的支持。当一个bean完成一个任务之后,希望另一个bean能做出响应的任务,那么就能使用spring事件机制完成。
使用spring事件需要完成三个步骤即可
1)自定义事件,继承ApplicationEvent
public class IndexEvent extends ApplicationEvent {
    public String msg;
    public IndexEvent(Object source,String msg) {
        super(source);
        this.msg = msg;
    }

    public String getMsg() {
        return msg;
    }

    public void setMsg(String msg) {
        this.msg = msg;
    }

    public void myIndexEvent(){
        System.out.println("myIndexEvent。。。。。。。。。。。。" + msg);
    }
}
2)自定义事件监听器,实现ApplicationListener。注意要把创建的监听器交给容器管理
@Component
public class IndexListener implements ApplicationListener<IndexEvent> {

    public void onApplicationEvent(IndexEvent indexEvent) {
        System.out.println("监听器监听事件............");
        indexEvent.myIndexEvent();
    }
}
注意加上@Component
3)使用spring容器发布事件
public class SpringDemoMain {
    public static void main(String[] args) {
        ApplicationContext ac = new AnnotationConfigApplicationContext(AppConfig.class);
        IndexService bean = ac.getBean(IndexService.class);

        ac.publishEvent(new IndexEvent(bean,"spring事件。。。。。"));
    }
}
最后输出:
本人水平有限,难免有错误或遗漏之处,望大家指正和谅解,提出宝贵意见,愿与之交流。


