一、前言
MobileIMSDK是什么?
一个专为移动端开发的开源原创即时通讯框架,超轻量级、高度提炼,完全基于UDP协议,支持iOS、Android、标准Java平台,服务端基于Mina和Netty编写。MobileIMSDK还可与姊妹工程 MobileIMSDK-Web无缝互通,从而实现Web网页端聊天或推送等。
本文将实现
- 基于
springboot2.1.8.RELEASE集成MobileIMSDK - 开发IM
服务端 - 开发
客户端 - 实现Java
客户端与客户端之间的通信
二、SpringBoot 集成 MobileIMSDK 准备
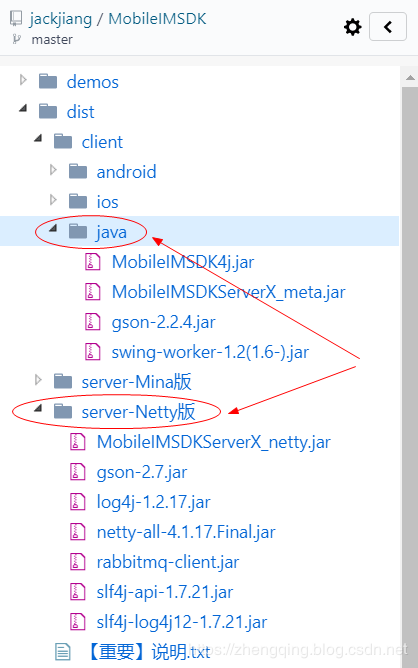
1、MobileIMSDK下载:https://gitee.com/jackjiang/MobileIMSDK
- 服务端所需jar包:
dist/server-xxx - 客服端所需jar包:
dist/client/java
2、pom.xml中引入相关依赖
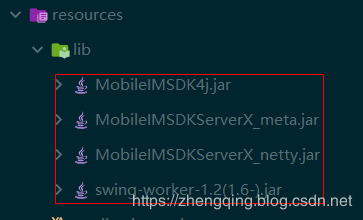
由于这里是maven项目,其中一部分jar包可通过maven仓库直接引入,而其余的则通过外部jar包引入方式使用即可~
如下4个需作为外部jar包在pom.xml中引入
<!-- https://mvnrepository.com/artifact/com.google.code.gson/gson -->
<dependency>
    <groupId>com.google.code.gson</groupId>
    <artifactId>gson</artifactId>
    <version>2.8.5</version>
</dependency>

<!-- MobileIMSDK所需jar包依赖[注:这里是在本地lib中引入,maven中央仓库中暂无此jar包],要与<includeSystemScope>true</includeSystemScope>配合使用-->
<dependency>
    <groupId>com.zhengqing</groupId>
    <artifactId>MobileIMSDK4j</artifactId>
    <scope>system</scope>
    <systemPath>${project.basedir}/src/main/resources/lib/MobileIMSDK4j.jar</systemPath>
</dependency>
<dependency>
    <groupId>com.zhengqing</groupId>
    <artifactId>MobileIMSDKServerX_meta</artifactId>
    <scope>system</scope>
    <systemPath>${project.basedir}/src/main/resources/lib/MobileIMSDKServerX_meta.jar</systemPath>
</dependency>
<dependency>
    <groupId>com.zhengqing</groupId>
    <artifactId>swing-worker-1.2(1.6-)</artifactId>
    <scope>system</scope>
    <systemPath>${project.basedir}/src/main/resources/lib/swing-worker-1.2(1.6-).jar</systemPath>
</dependency>
<dependency>
    <groupId>com.zhengqing</groupId>
    <artifactId>MobileIMSDKServerX_netty</artifactId>
    <scope>system</scope>
    <systemPath>${project.basedir}/src/main/resources/lib/MobileIMSDKServerX_netty.jar</systemPath>
</dependency>
<plugins>
<!-- maven打包插件 -> 将整个工程打成一个 fatjar -->
<plugin>
<groupId>org.springframework.boot</groupId>
<artifactId>spring-boot-maven-plugin</artifactId>
<!-- 作用:项目打成jar,同时把本地jar包也引入进去 -->
<configuration>
<includeSystemScope>true</includeSystemScope>
</configuration>
</plugin>
</plugins>三、开发服务端
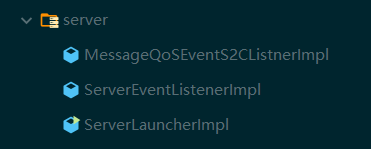
1、与客服端的所有数据交互事件(实现ServerEventListener类)
public class ServerEventListenerImpl implements ServerEventListener {
    private static Logger logger = LoggerFactory.getLogger(ServerEventListenerImpl.class);

    /**
     * 用户身份验证回调方法定义.
     * <p>
     * 服务端的应用层可在本方法中实现用户登陆验证。
     * <br>
     * 注意:本回调在一种特殊情况下——即用户实际未退出登陆但再次发起来登陆包时,本回调是不会被调用的!
     * <p>
     * 根据MobileIMSDK的算法实现,本方法中用户验证通过(即方法返回值=0时)后
     * ,将立即调用回调方法 {@link #onUserLoginAction_CallBack(int, String, IoSession)}。
     * 否则会将验证结果(本方法返回值错误码通过客户端的 ChatBaseEvent.onLoginMessage(int dwUserId, int dwErrorCode)
     * 方法进行回调)通知客户端)。
     *
     * @param userId  传递过来的准一id,保证唯一就可以通信,可能是登陆用户名、也可能是任意不重复的id等,具体意义由业务层决定
     * @param token   用于身份鉴别和合法性检查的token,它可能是登陆密码,也可能是通过前置单点登陆接口拿到的token等,具体意义由业务层决定
     * @param extra   额外信息字符串。本字段目前为保留字段,供上层应用自行放置需要的内容
     * @param session 此客户端连接对应的 netty “会话”
     * @return 0 表示登陆验证通过,否则可以返回用户自已定义的错误码,错误码值应为:>=1025的整数
     */
    @Override
    public int onVerifyUserCallBack(String userId, String token, String extra, Channel session) {
        logger.debug("【DEBUG_回调通知】正在调用回调方法:OnVerifyUserCallBack...(extra=" + extra + ")");
        return 0;
    }

    /**
     * 用户登录验证成功后的回调方法定义(可理解为上线通知回调).
     * <p>
     * 服务端的应用层通常可在本方法中实现用户上线通知等。
     * <br>
     * 注意:本回调在一种特殊情况下——即用户实际未退出登陆但再次发起来登陆包时,回调也是一定会被调用。
     *
     * @param userId  传递过来的准一id,保证唯一就可以通信,可能是登陆用户名、也可能是任意不重复的id等,具体意义由业务层决定
     * @param extra   额外信息字符串。本字段目前为保留字段,供上层应用自行放置需要的内容。为了丰富应用层处理的手段,在本回调中也把此字段传进来了
     * @param session 此客户端连接对应的 netty “会话”
     */
    @Override
    public void onUserLoginAction_CallBack(String userId, String extra, Channel session) {
        logger.debug("【IM_回调通知OnUserLoginAction_CallBack】用户:" + userId + " 上线了!");
    }

    /**
     * 用户退出登录回调方法定义(可理解为下线通知回调)。
     * <p>
     * 服务端的应用层通常可在本方法中实现用户下线通知等。
     *
     * @param userId  下线的用户user_id
     * @param obj
     * @param session 此客户端连接对应的 netty “会话”
     */
    @Override
    public void onUserLogoutAction_CallBack(String userId, Object obj, Channel session) {
        logger.debug("【DEBUG_回调通知OnUserLogoutAction_CallBack】用户:" + userId + " 离线了!");
    }

    /**
     * 通用数据回调方法定义(客户端发给服务端的(即接收user_id="0")).
     * <p>
     * MobileIMSDK在收到客户端向user_id=0(即接收目标是服务器)的情况下通过
     * 本方法的回调通知上层。上层通常可在本方法中实现如:添加好友请求等业务实现。
     *
     * <p style="background:#fbf5ee;border-radius:4px;">
     * <b><font color="#ff0000">【版本兼容性说明】</font></b>本方法用于替代v3.x中的以下方法:<br>
     * <code>public boolean onTransBuffer_CallBack(String userId, String from_user_id
     * , String dataContent, String fingerPrint, int typeu, Channel session);
     * </code>
     *
     * @param userId       接收方的user_id(本方法接收的是发给服务端的消息,所以此参数的值肯定==0)
     * @param from_user_id 发送方的user_id
     * @param dataContent  数据内容(文本形式)
     * @param session      此客户端连接对应的 netty “会话”
     * @return true表示本方法已成功处理完成,否则表示未处理成功。此返回值目前框架中并没有特殊意义,仅作保留吧
     * @since 4.0
     */
    @Override
    public boolean onTransBuffer_C2S_CallBack(Protocal p, Channel session) {
        // 接收者uid
        String userId = p.getTo();
        // 发送者uid
        String from_user_id = p.getFrom();
        // 消息或指令内容
        String dataContent = p.getDataContent();
        // 消息或指令指纹码(即唯一ID)
        String fingerPrint = p.getFp();
        // 【重要】用户定义的消息或指令协议类型(开发者可据此类型来区分具体的消息或指令)
        int typeu = p.getTypeu();

        logger.debug("【DEBUG_回调通知】[typeu=" + typeu + "]收到了客户端" + from_user_id + "发给服务端的消息:str=" + dataContent);
        return true;
    }

    /**
     * 通道数据回调函数定义(客户端发给客户端的(即接收方user_id不为“0”的情况)).
     * <p>
     * <b>注意:</b>本方法当且仅当在数据被服务端成功在线发送出去后被回调调用.
     * <p>
     * 上层通常可在本方法中实现用户聊天信息的收集,以便后期监控分析用户的行为等^_^。
     * <p>
     * 提示:如果开启消息QoS保证,因重传机制,本回调中的消息理论上有重复的可能,请以参数 #fingerPrint
     * 作为消息的唯一标识ID进行去重处理。
     *
     * <p style="background:#fbf5ee;border-radius:4px;">
     * <b><font color="#ff0000">【版本兼容性说明】</font></b>本方法用于替代v3.x中的以下方法:<br>
     * <code>public void onTransBuffer_C2C_CallBack(String userId, String from_user_id
     * , String dataContent, String fingerPrint, int typeu);
     *
     * @param userId       接收方的user_id(本方法接收的是客户端发给客户端的,所以此参数的值肯定>0)
     * @param from_user_id 发送方的user_id
     * @param dataContent
     * @since 4.0
     */
    @Override
    public void onTransBuffer_C2C_CallBack(Protocal p) {
        // 接收者uid
        String userId = p.getTo();
        // 发送者uid
        String from_user_id = p.getFrom();
        // 消息或指令内容
        String dataContent = p.getDataContent();
        // 消息或指令指纹码(即唯一ID)
        String fingerPrint = p.getFp();
        // 【重要】用户定义的消息或指令协议类型(开发者可据此类型来区分具体的消息或指令)
        int typeu = p.getTypeu();

        logger.debug("【DEBUG_回调通知】[typeu=" + typeu + "]收到了客户端" + from_user_id + "发给客户端" + userId + "的消息:str=" + dataContent);
    }

    /**
     * 通用数据实时发送失败后的回调函数定义(客户端发给客户端的(即接收方user_id不为“0”的情况)).
     * <p>
     * 注意:本方法当且仅当在数据被服务端<u>在线发送</u>失败后被回调调用.
     * <p>
     * <b>此方法存的意义何在?</b><br>
     * 发生此种情况的场景可能是:对方确实不在线(那么此方法里就可以作为离线消息处理了)、
     * 或者在发送时判断对方是在线的但服务端在发送时却没有成功(这种情况就可能是通信错误
     * 或对方非正常通出但尚未到达会话超时时限)。<br><u>应用层在此方法里实现离线消息的处理即可!</u>
     *
     * <p style="background:#fbf5ee;border-radius:4px;">
     * <b><font color="#ff0000">【版本兼容性说明】</font></b>本方法用于替代v3.x中的以下方法:<br>
     * <code>public boolean onTransBuffer_C2C_RealTimeSendFaild_CallBack(String userId
     * , String from_user_id, String dataContent, String fingerPrint, int typeu);
     * </code>
     *
     * @param userId       接收方的user_id(本方法接收的是客户端发给客户端的,所以此参数的值肯定>0),此id在本方法中不一定保证有意义
     * @param from_user_id 发送方的user_id
     * @param dataContent  消息内容
     * @param fingerPrint  该消息对应的指纹(如果该消息有QoS保证机制的话),用于在QoS重要机制下服务端离线存储时防止重复存储哦
     * @return true表示应用层已经处理了离线消息(如果该消息有QoS机制,则服务端将代为发送一条伪应答包
     * (伪应答仅意味着不是接收方的实时应答,而只是存储到离线DB中,但在发送方看来也算是被对方收到,只是延
     * 迟收到而已(离线消息嘛))),否则表示应用层没有处理(如果此消息有QoS机制,则发送方在QoS重传机制超时
     * 后报出消息发送失败的提示)
     * @see #onTransBuffer_C2C_CallBack(Protocal)
     * @since 4.0
     */
    @Override
    public boolean onTransBuffer_C2C_RealTimeSendFaild_CallBack(Protocal p) {
        // 接收者uid
        String userId = p.getTo();
        // 发送者uid
        String from_user_id = p.getFrom();
        // 消息或指令内容
        String dataContent = p.getDataContent();
        // 消息或指令指纹码(即唯一ID)
        String fingerPrint = p.getFp();
        // 【重要】用户定义的消息或指令协议类型(开发者可据此类型来区分具体的消息或指令)
        int typeu = p.getTypeu();

        logger.debug("【DEBUG_回调通知】[typeu=" + typeu + "]客户端" + from_user_id + "发给客户端" + userId + "的消息:str=" + dataContent
                + ",因实时发送没有成功,需要上层应用作离线处理哦,否则此消息将被丢弃.");
        return false;
    }
}2、服务端主动发起消息的QoS回调通知(实现MessageQoSEventListenerS2C类)
public class MessageQoSEventS2CListnerImpl implements MessageQoSEventListenerS2C {
    private static Logger logger = LoggerFactory.getLogger(MessageQoSEventS2CListnerImpl.class);

    @Override
    public void messagesLost(ArrayList<Protocal> lostMessages) {
        logger.debug("【DEBUG_QoS_S2C事件】收到系统的未实时送达事件通知,当前共有"
                + lostMessages.size() + "个包QoS保证机制结束,判定为【无法实时送达】!");
    }

    @Override
    public void messagesBeReceived(String theFingerPrint) {
        if (theFingerPrint != null) {
            logger.debug("【DEBUG_QoS_S2C事件】收到对方已收到消息事件的通知,fp=" + theFingerPrint);
        }
    }
}
3、服务端配置
public class ServerLauncherImpl extends ServerLauncher {
    // 静态类方法:进行一些全局配置设置
    static {
        // 设置AppKey(此key目前为保留字段,请忽略之)
        ServerLauncher.appKey = "5418023dfd98c579b6001741";

        // 设置MobileIMSDK服务端的网络监听端口
        ServerLauncherImpl.PORT = 7901;

        // 开/关Demog日志的输出
        QoS4SendDaemonS2C.getInstance().setDebugable(true);
        QoS4ReciveDaemonC2S.getInstance().setDebugable(true);
        ServerLauncher.debug = true;

        // TODO 与客户端协商一致的心跳敏感模式设置
//        ServerToolKits.setSenseMode(SenseMode.MODE_10S);

        // 关闭与Web端的消息互通桥接器(其实SDK中默认就是false)
        ServerLauncher.bridgeEnabled = false;
        // TODO 跨服桥接器MQ的URI(本参数只在ServerLauncher.bridgeEnabled为true时有意义)
//        BridgeProcessor.IMMQ_URI = "amqp://js:19844713@192.168.31.190";
    }

    // 实例构造方法
    public ServerLauncherImpl() throws IOException {
        super();
    }

    /**
     * 初始化消息处理事件监听者.
     */
    @Override
    protected void initListeners() {
        // ** 设置各种回调事件处理实现类
        this.setServerEventListener(new ServerEventListenerImpl());
        this.setServerMessageQoSEventListener(new MessageQoSEventS2CListnerImpl());
    }

}
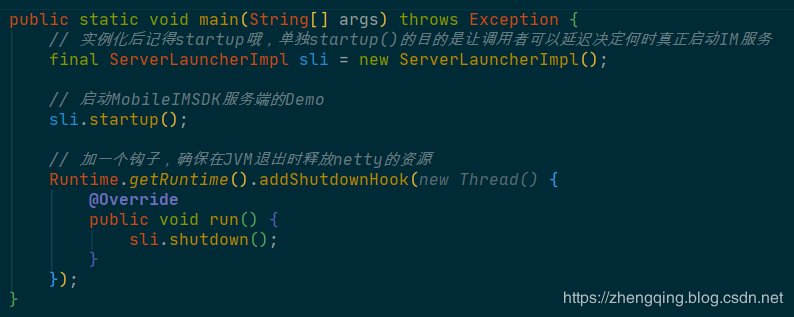
4、服务端启动类
温馨小提示:这里由于小编将服务端和客户端集成在同一个项目中,因此如下配置
- SpringBoot的
CommandLineRunner接口主要用于实现在服务初始化后,去执行一段代码块逻辑(run方法),这段初始化代码在整个应用生命周期内只会执行一次! @Order(value = 1):按照一定的顺序去执行,value值越小越先执行
@Slf4j
@Component
@Order(value = 1)
public class ChatServerRunner implements CommandLineRunner {

    @Override
    public void run(String... strings) throws Exception {
        log.info("================= ↓↓↓↓↓↓ 启动MobileIMSDK服务端 ↓↓↓↓↓↓ =================");
        // 实例化后记得startup哦,单独startup()的目的是让调用者可以延迟决定何时真正启动IM服务
        final ServerLauncherImpl sli = new ServerLauncherImpl();
        // 启动MobileIMSDK服务端的Demo
        sli.startup();

        // 加一个钩子,确保在JVM退出时释放netty的资源
        Runtime.getRuntime().addShutdownHook(new Thread(sli::shutdown));
    }

}
如果服务端与客户端不在同一个项目 ,服务端可直接通过如下方式启动即可~
四、开发客户端
1、客户端与IM服务端连接事件
@Slf4j
public class ChatBaseEventImpl implements ChatBaseEvent {

    @Override
    public void onLoginMessage(int dwErrorCode) {
        if (dwErrorCode == 0) {
            log.debug("IM服务器登录/连接成功!");
        } else {
            log.error("IM服务器登录/连接失败,错误代码:" + dwErrorCode);
        }
    }

    @Override
    public void onLinkCloseMessage(int dwErrorCode) {
        log.error("与IM服务器的网络连接出错关闭了,error:" + dwErrorCode);
    }

}
2、接收消息事件
@Slf4j
public class ChatTransDataEventImpl implements ChatTransDataEvent {

    @Override
    public void onTransBuffer(String fingerPrintOfProtocal, String userid, String dataContent, int typeu) {
        log.debug("[typeu=" + typeu + "]收到来自用户" + userid + "的消息:" + dataContent);
    }

    @Override
    public void onErrorResponse(int errorCode, String errorMsg) {
        log.debug("收到服务端错误消息,errorCode=" + errorCode + ", errorMsg=" + errorMsg);
    }

}
3、消息是否送达事件
@Slf4j
public class MessageQoSEventImpl implements MessageQoSEvent {

    @Override // 对方未成功接收消息的回调事件 lostMessages:存放消息内容
    public void messagesLost(ArrayList<Protocal> lostMessages) {
        log.debug("收到系统的未实时送达事件通知,当前共有" + lostMessages.size() + "个包QoS保证机制结束,判定为【无法实时送达】!");
    }

    @Override // 对方成功接收到消息的回调事件
    public void messagesBeReceived(String theFingerPrint) {
        if (theFingerPrint != null) {
            log.debug("收到对方已收到消息事件的通知,fp=" + theFingerPrint);
        }
    }

}
4、MobileIMSDK初始化配置
public class IMClientManager {
    private static IMClientManager instance = null;

    /**
     * MobileIMSDK是否已被初始化. true表示已初化完成,否则未初始化.
     */
    private boolean init = false;

    public static IMClientManager getInstance() {
        if (instance == null) {
            instance = new IMClientManager();
        }
        return instance;
    }

    private IMClientManager() {
        initMobileIMSDK();
    }

    public void initMobileIMSDK() {
        if (!init) {
            // 设置AppKey
            ConfigEntity.appKey = "5418023dfd98c579b6001741";

            // 设置服务器ip和服务器端口
            ConfigEntity.serverIP = "127.0.0.1";
            ConfigEntity.serverUDPPort = 7901;

            // MobileIMSDK核心IM框架的敏感度模式设置
//            ConfigEntity.setSenseMode(SenseMode.MODE_10S);

            // 开启/关闭DEBUG信息输出
            ClientCoreSDK.DEBUG = false;

            // 设置事件回调
            ClientCoreSDK.getInstance().setChatBaseEvent(new ChatBaseEventImpl());
            ClientCoreSDK.getInstance().setChatTransDataEvent(new ChatTransDataEventImpl());
            ClientCoreSDK.getInstance().setMessageQoSEvent(new MessageQoSEventImpl());

            init = true;
        }
    }

}
6、连接IM服务端,发送消息
服务类
public interface IChatService {

    /**
     * 登录连接IM服务器请求
     *
     * @param username: 用户名
     * @param password: 密码
     * @return: void
     */
    void loginConnect(String username, String password);

    /**
     * 发送消息
     *
     * @param friendId: 接收消息者id
     * @param msg:      消息内容
     * @return: void
     */
    void sendMsg(String friendId, String msg);

}
服务实现类
@Slf4j
@Service
@Transactional(rollbackFor = Exception.class)
public class ChatServiceImpl implements IChatService {

    @Override
    public void loginConnect(String username, String password) {
        // 确保MobileIMSDK被初始化哦(整个APP生生命周期中只需调用一次哦)
        // 提示:在不退出APP的情况下退出登陆后再重新登陆时,请确保调用本方法一次,不然会报code=203错误哦!
        IMClientManager.getInstance().initMobileIMSDK();

        // * 异步提交登陆名和密码
        new LocalUDPDataSender.SendLoginDataAsync(username, password) {
            /**
             * 登陆信息发送完成后将调用本方法(注意:此处仅是登陆信息发送完成,真正的登陆结果要在异步回调中处理哦)。
             * @param code 数据发送返回码,0 表示数据成功发出,否则是错误码
             */
            protected void fireAfterSendLogin(int code) {
                if (code == 0) {
                    log.debug("数据发送成功!");
                } else {
                    log.error("数据发送失败。错误码是:" + code);
                }
            }
        }.execute();
    }

    @Override
    public void sendMsg(String friendId, String msg) {
        // 发送消息(异步提升体验,你也可直接调用LocalUDPDataSender.send(..)方法发送)
        new LocalUDPDataSender.SendCommonDataAsync(msg, friendId) {
            @Override
            protected void onPostExecute(Integer code) {
                if (code == 0) {
                    log.debug("数据已成功发出!");
                } else {
                    log.error("数据发送失败。错误码是:" + code + "!");
                }
            }
        }.execute();
    }

}
五、编写Controller进行测试
@RestController
@RequestMapping("/api")
@Api(tags = "聊天测试-接口")
public class ChatController {

    @Autowired
    private IChatService chatService;

    @PostMapping(value = "/loginConnect", produces = Constants.CONTENT_TYPE)
    @ApiOperation(value = "登陆请求", httpMethod = "POST", response = ApiResult.class)
    public ApiResult loginConnect(@RequestParam String username, @RequestParam String password) {
        chatService.loginConnect(username, password);
        return ApiResult.ok();
    }

    @PostMapping(value = "/sendMsg", produces = Constants.CONTENT_TYPE)
    @ApiOperation(value = "发送消息", httpMethod = "POST", response = ApiResult.class)
    public ApiResult sendMsg(@RequestParam String friendId, @RequestParam String msg) {
        chatService.sendMsg(friendId, msg);
        return ApiResult.ok();
    }

}启动项目,访问:http://127.0.0.1:8080/swagger-ui.html
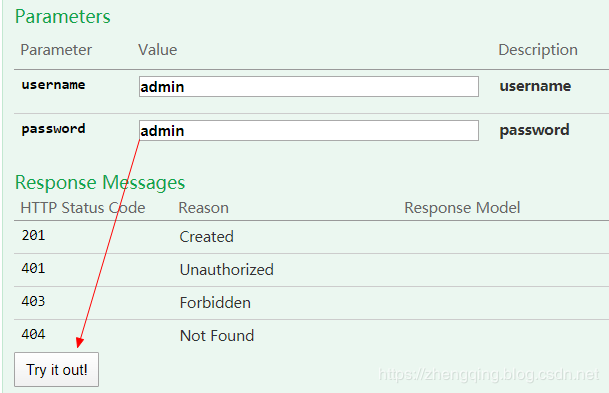
1、 loginConnect接口:任意输入一个账号密码登录连接IM服务端
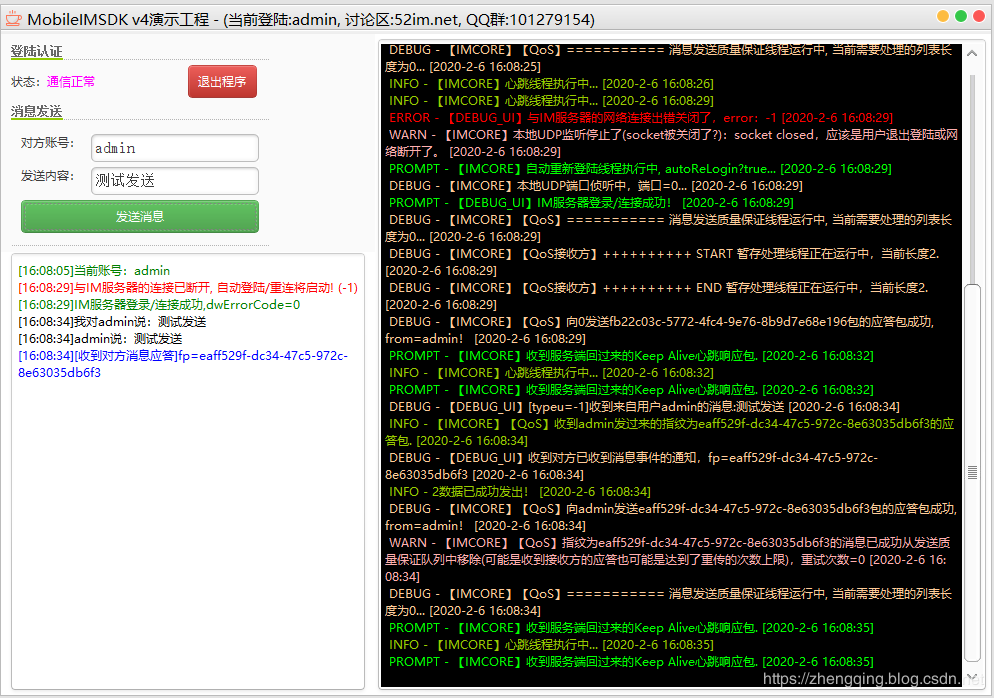
控制台日志如下:
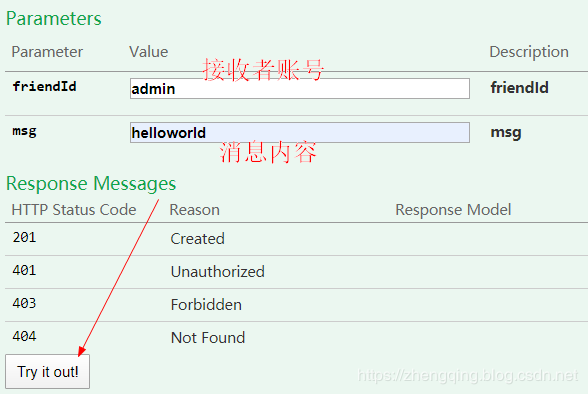
2、 sendMsg接口:给指定用户发送消息,这里由于只有一个客户端,上一步登录了一个admin账号,因此小编给admin账号(也就是自己) 发送消息
控制台日志如下:
六、总结
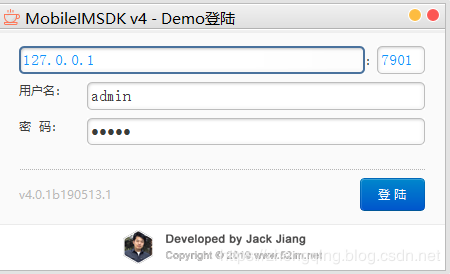
关于集成可参考MobileIMSDK给出的文档一步一步实现,其中给出了通过Java GUI编程实现的一个小demo,我们可以先将其运行起来,先体验一下功能,代码量也不是太多,我们可以通过debug方式查看执行流程,清楚执行流程之后我们就可以将demo中的代码移植到我们自己的项目中加以修改运用于自己的业务中,切勿拿起就跑,否则一旦运气不好,将浪费更多的时间去集成,这样很不好!
案例demo中相关代码注释都有,这里就简单说下整个流程吧:
- 首先启动IM服务端
- 用户在客户端登录一个用户与服务端建立连接保持通信( 客户端
ChatServiceImpl中loginConnect方法为登录连接服务端事件;服务端ServerEventListenerImpl中onUserLoginAction_CallBack方法为服务端接收的上线通知事件) - 客户端通过
ChatServiceImpl中sendMsg方法发送一条消息,如果对方在线能接收消息则走服务端ServerEventListenerImpl中onTransBuffer_C2C_CallBack方法,否则走onTransBuffer_C2C_RealTimeSendFaild_CallBack方法;如果对方成功接收到消息,客户端将走MessageQoSEventImpl中messagesBeReceived事件,否则走messagesLost事件 - 客户端通过
ChatTransDataEventImpl中onTransBuffer回调事件接收消息

