Easycode是idea的一个插件,可以直接对数据的表生成entity,controller,service,dao,mapper,无需任何编码,简单而强大。
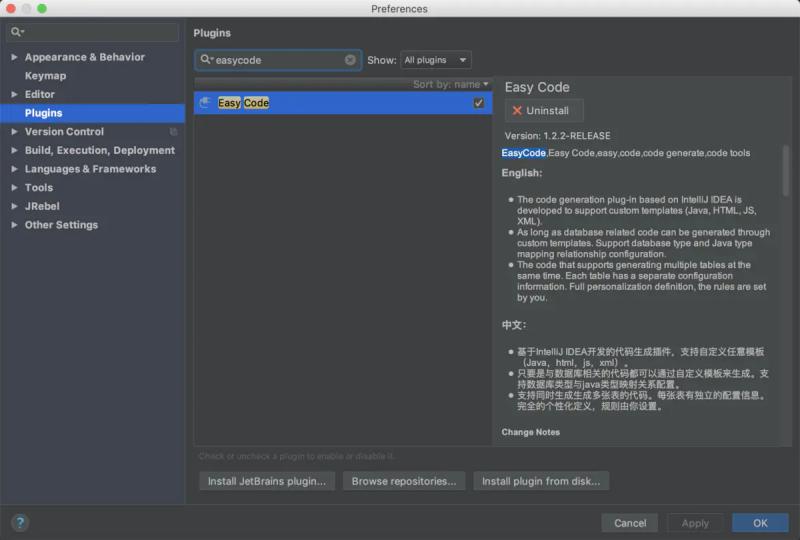
1、安装(EasyCode)
我这里的话是已经那装好了。
建议大家在安装一个插件,叫做Lombok。
Lombok能通过注解的方式,在编译时自动为属性生成构造器、getter/setter、equals、hashcode、toString方法。出现的神奇就是在源码中没有getter和setter方法,但是在编译生成的字节码文件中有getter和setter方法。
2、建立数据库
-- ----------------------------
-- Table structure for user
-- ----------------------------
DROP TABLE IF EXISTS `user`;
CREATE TABLE `user` (
  `id` int(11) NOT NULL,
  `username` varchar(20) DEFAULT NULL,
  `sex` varchar(6) DEFAULT NULL,
  `birthday` date DEFAULT NULL,
  `address` varchar(20) DEFAULT NULL,
  `password` varchar(20) DEFAULT NULL,
  PRIMARY KEY (`id`)
) ENGINE=InnoDB DEFAULT CHARSET=utf8;
SET FOREIGN_KEY_CHECKS = 1;
3、在IDEA配置连接数据库
在这个之前,新建一个Springboot项目,这个应该是比较简单的。
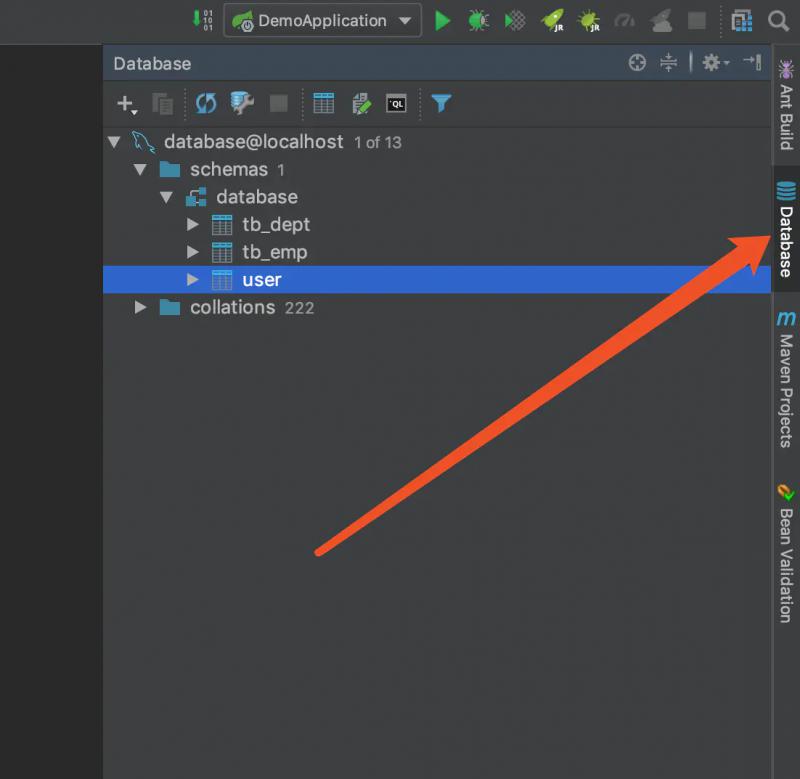
建好SpringBoot项目之后,如下图所示,找到这个Database
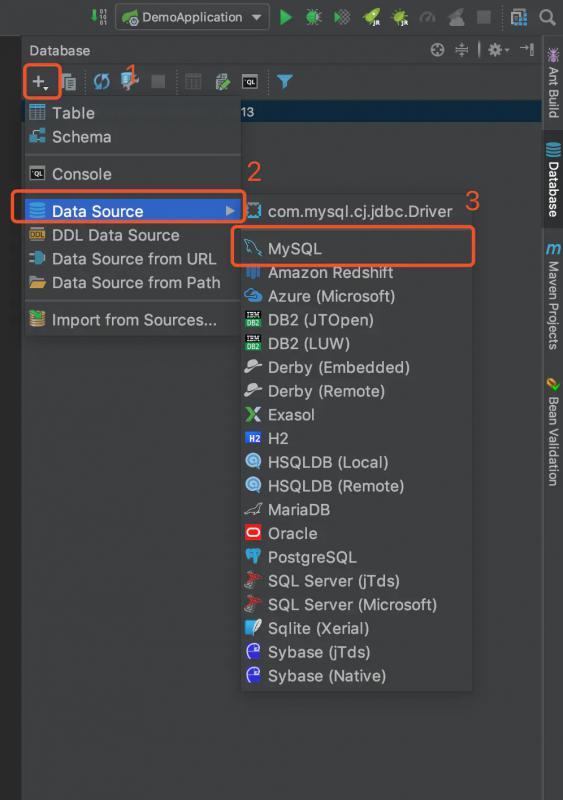
按照如下图所示进行操作:
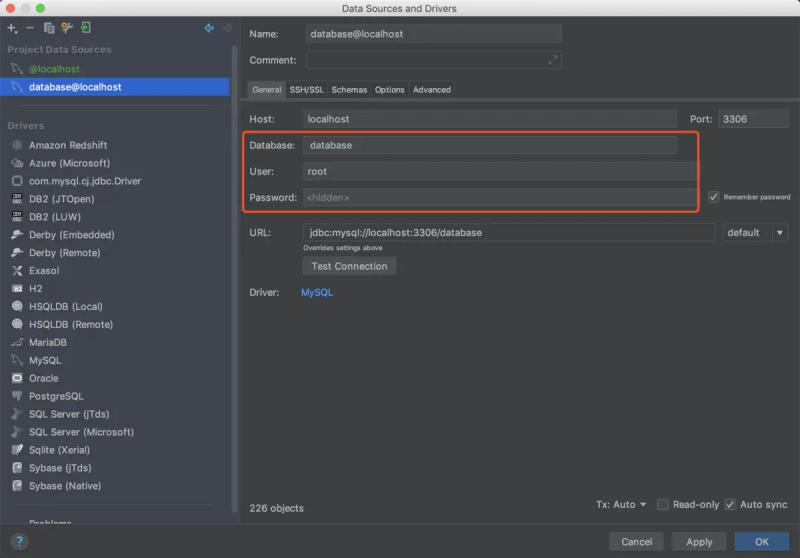
然后填写数据库名字,用户名,密码。点击OK即可。这样的话,IDEA连接数据库就完事了。
4、开始生成代码
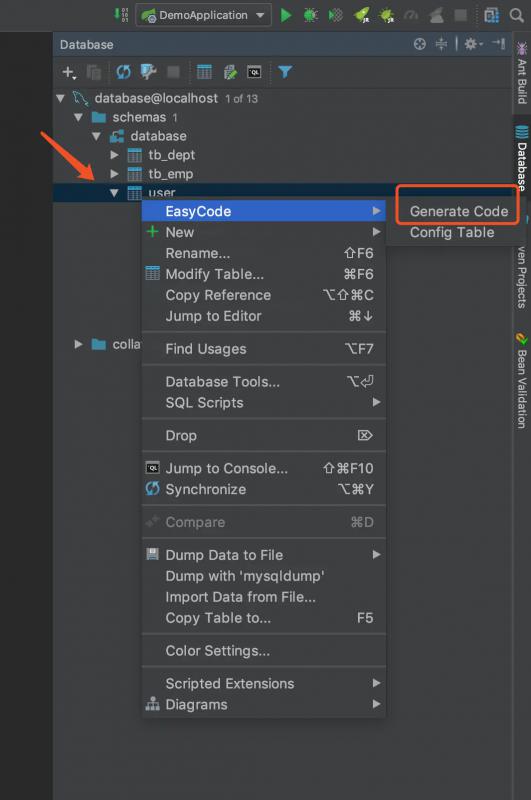
在这个里面找到你想生成的表,然后右键,就会出现如下所示的截面。
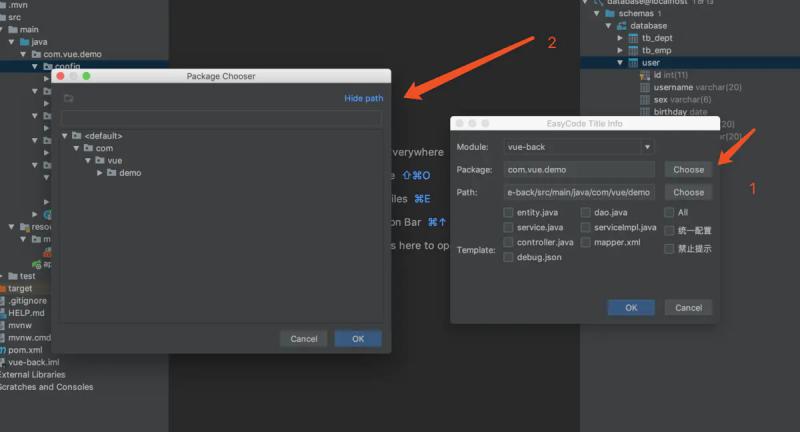
点击1所示的位置,选择你要将生成的代码放入哪个文件夹中,选择完以后点击OK即可。
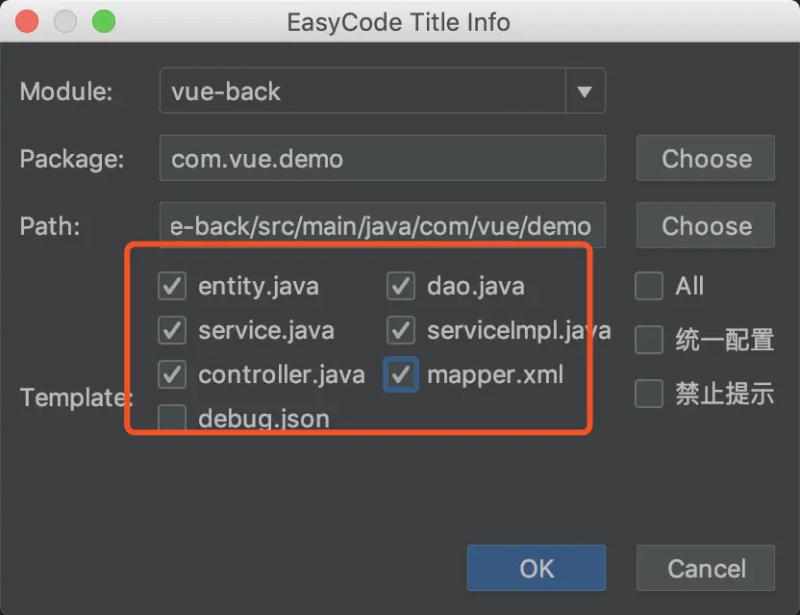
勾选你需要生成的代码,点击OK。
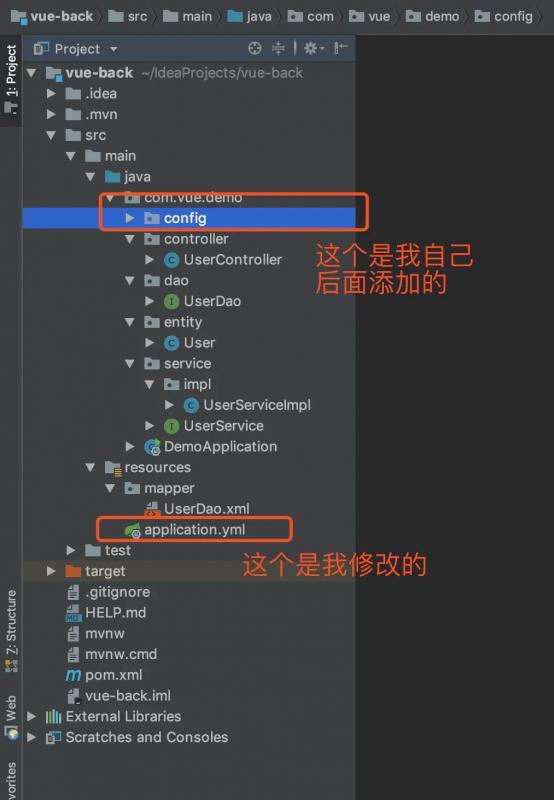
这样的话就完成了代码的生成了,生成的代码如下图所示:
5、pom.xml
 <dependency>
            <groupId>org.springframework.boot</groupId>
            <artifactId>spring-boot-starter</artifactId>
        </dependency>

        <dependency>
            <groupId>org.springframework.boot</groupId>
            <artifactId>spring-boot-starter-web</artifactId>
        </dependency>

        <dependency>
            <groupId>org.projectlombok</groupId>
            <artifactId>lombok</artifactId>
            <optional>true</optional>
        </dependency>

        <!--热部署-->
        <dependency>
            <groupId>org.springframework.boot</groupId>
            <artifactId>spring-boot-devtools</artifactId>
            <optional>true</optional> <!-- 这个需要为 true 热部署才有效 -->
        </dependency>

        <!--mybatis-->
        <dependency>
            <groupId>org.mybatis.spring.boot</groupId>
            <artifactId>mybatis-spring-boot-starter</artifactId>
            <version>1.3.2</version>
        </dependency>

        <!-- mysql -->
        <dependency>
            <groupId>mysql</groupId>
            <artifactId>mysql-connector-java</artifactId>
            <version>5.1.47</version>
        </dependency>

        <!--阿里巴巴连接池-->
        <dependency>
            <groupId>com.alibaba</groupId>
            <artifactId>druid</artifactId>
            <version>1.0.9</version>
        </dependency>
6、Application.yml
server:
  port: 8089
spring:
  datasource:
    url: jdbc:mysql://127.0.0.1:3306/database?useUnicode=true&characterEncoding=UTF-8
    username: root
    password: 123456
    type: com.alibaba.druid.pool.DruidDataSource
    driver-class-name: com.mysql.jdbc.Driver

mybatis:
  mapper-locations: classpath:/mapper/*Dao.xml
  typeAliasesPackage: com.vue.demo.entity
7、启动项目
在启动项目之前,我们需要先修改两个地方。
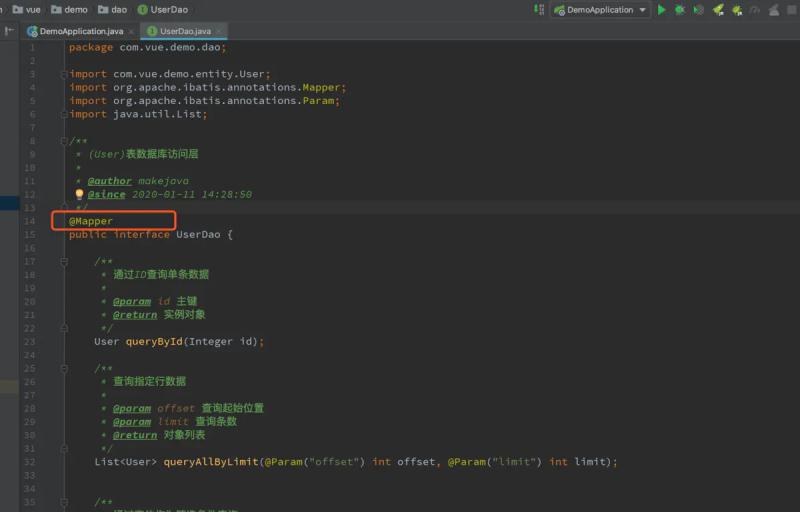
在dao层加上@mapper注解
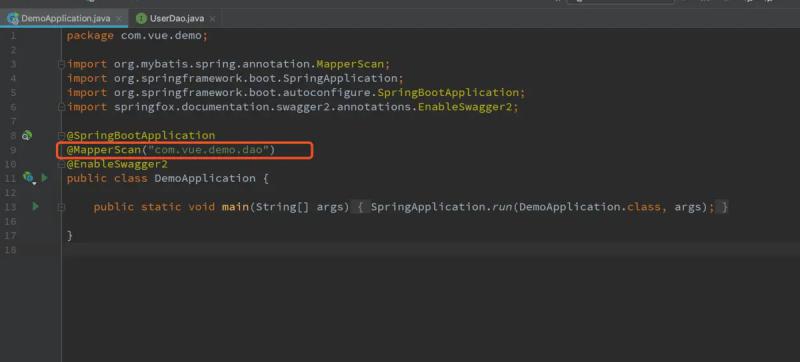
在启动类里面加上@MapperScan("com.vue.demo.dao")注解。
启动项目
测试一下
作者:HeloWxl
链接:https://www.jianshu.com/p/e41...

