前面
在当前国家对知识产权的重视程度一步步加大的国情下,使用盗版软件的风气会在未来进行打压与限制,尤其会严查企业级的软件侵权。这是综合国力,科技水平发展到一定阶段所必走的一步,也是不断提高创新力的必不可少的保障。
所以,国内芯片(MCU)厂家,如果支持开源免费的开发工具,那是在给企业省钱,也是在未来市场的一大优势。
GD这方面做的似乎不是很好。
GDLink是没有串口功能的,如果支持串口功能就完美了。
开始
上一次只是移植了rt-thread nano的内核,但rt-thread的finsh/shell,是一大很有特点的功能,没有finsh/shell的rt-thread是不完整的,所以,这次开始添加finsh/shell功能。
要实现finsh/shell功能,首先,要实现串口的功能。
添加uart.c与uart.h两个文件到工程中。
添加相应的串口初始化函数。
可以选择增加printf的支持,写上int fputc(int ch, FILE *f)函数;
uart.c文件代码如下:
#include "gd32f3x0.h"
#include "gd32f310k_start.h"
#include "systick.h"
#include <rtthread.h>
#include "uart.h"


static rcu_periph_enum COM_CLK[COMn]  = {EVAL_COM_CLK};
static uint32_t COM_TX_PIN[COMn]      = {EVAL_COM_TX_PIN};

static uint32_t COM_RX_PIN[COMn]      = {EVAL_COM_RX_PIN};

void usart_init(uint32_t com)
{
    uint32_t COM_ID = 0U;

    if(EVAL_COM == com){
        COM_ID = 0U;
    }else{
    }

        /* enable COM GPIO clock */
    rcu_periph_clock_enable(EVAL_COM_GPIO_CLK);

    /* enable USART clock */
    rcu_periph_clock_enable(COM_CLK[COM_ID]);
        /* connect port to USARTx_Tx */
    gpio_af_set(EVAL_COM_GPIO_PORT, EVAL_COM_AF, COM_TX_PIN[COM_ID]);

    /* connect port to USARTx_Rx */
    gpio_af_set(EVAL_COM_GPIO_PORT, EVAL_COM_AF, COM_RX_PIN[COM_ID]);

    /* configure USART Tx as alternate function push-pull */
    gpio_mode_set(EVAL_COM_GPIO_PORT, GPIO_MODE_AF, GPIO_PUPD_PULLUP, COM_TX_PIN[COM_ID]);
    gpio_output_options_set(EVAL_COM_GPIO_PORT, GPIO_OTYPE_PP, GPIO_OSPEED_10MHZ, COM_TX_PIN[COM_ID]);

    /* configure USART Rx as alternate function push-pull */
    gpio_mode_set(EVAL_COM_GPIO_PORT, GPIO_MODE_AF, GPIO_PUPD_PULLUP, COM_RX_PIN[COM_ID]);
    gpio_output_options_set(EVAL_COM_GPIO_PORT, GPIO_OTYPE_PP, GPIO_OSPEED_10MHZ, COM_RX_PIN[COM_ID]);

    /* USART configure */
    usart_deinit(com);
    usart_baudrate_set(com, 115200U);
    usart_receive_config(com, USART_RECEIVE_ENABLE);
    usart_transmit_config(com, USART_TRANSMIT_ENABLE);

    usart_enable(com);
}
int fputc(int ch, FILE *f)
{
    usart_data_transmit(EVAL_COM, (uint8_t)ch);
    while(RESET == usart_flag_get(EVAL_COM, USART_FLAG_TBE));
    return ch;
}
uart.h代码如下:
#ifndef UART_H
#define UART_H

#ifdef __cplusplus
 extern "C" {
#endif

#include "gd32f3x0.h"
#include <stdio.h>

#define COMn                             1U

#define EVAL_COM                         USART0
#define EVAL_COM_CLK                     RCU_USART0

#define EVAL_COM_TX_PIN                  GPIO_PIN_9
#define EVAL_COM_RX_PIN                  GPIO_PIN_10

#define EVAL_COM_GPIO_PORT               GPIOA
#define EVAL_COM_GPIO_CLK                RCU_GPIOA
#define EVAL_COM_AF                      GPIO_AF_1


void usart_init(uint32_t com);


#ifdef __cplusplus
}
#endif

#endif /* GD32F310C_EVAL_H */
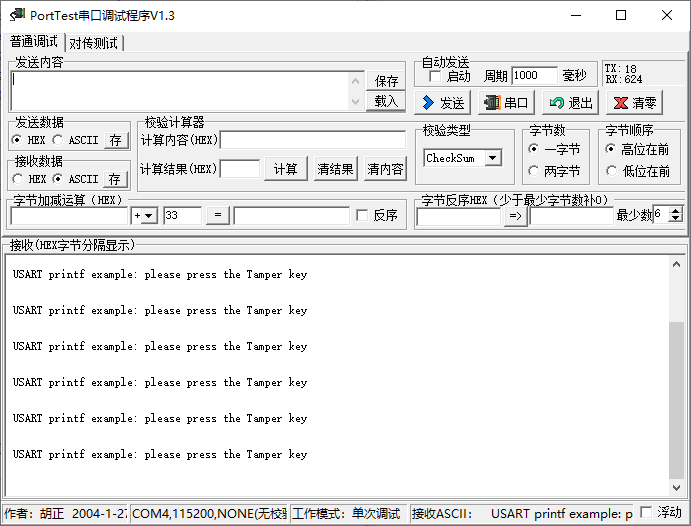
使用printf 测试串口功能
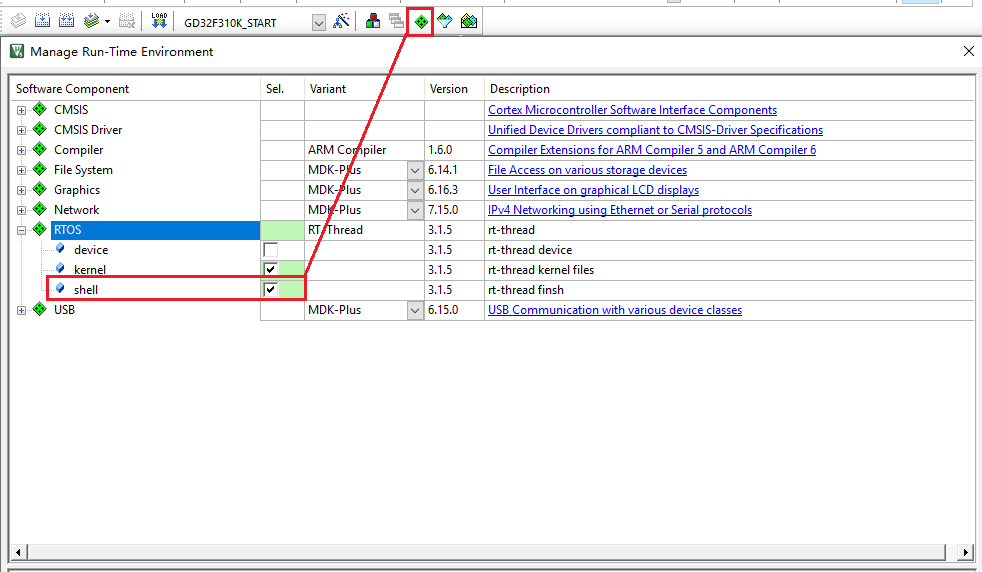
添加finsh组件
rtconfig.h中,去掉#include "finsh_config.h"的注释,这个在添加了组件后,是不会自动去掉的。
增加三个了函数的实际函数。
board.c
void rt_hw_console_output(const char *str)
static int uart_init(void)
static int uart_init(void)
{
    usart_init(EVAL_COM);
//#error "TODO 2: Enable the hardware uart and config baudrate."
    return 0;
}
INIT_BOARD_EXPORT(uart_init);

void rt_hw_console_output(const char *str)
{
    rt_size_t i = 0, size = 0;
     char a = '\r';
     size = rt_strlen(str);

    for (i = 0; i < size; i++){
        if (*(str + i) == '\n'){
            usart_data_transmit(EVAL_COM,a);
            while(RESET == usart_flag_get(EVAL_COM, USART_FLAG_TBE));
        }
        usart_data_transmit(EVAL_COM, *(str + i));
    while(RESET == usart_flag_get(EVAL_COM, USART_FLAG_TBE));
    }

//#error "TODO 3: Output the string 'str' through the uart."
}
finsh_port.c
RT_WEAK char rt_hw_console_getchar(void)
RT_WEAK char rt_hw_console_getchar(void)
{
    /* Note: the initial value of ch must < 0 */
    int ch = -1;

//#error "TODO 4: Read a char from the uart and assign it to 'ch'."
    if(RESET != usart_flag_get(EVAL_COM,USART_FLAG_RBNE))
    {
        ch=usart_data_receive(EVAL_COM);
    }
    else //USART_FLAG_ORERR
    {
        if(RESET !=usart_flag_get(EVAL_COM,USART_FLAG_ORERR))
            usart_flag_clear(EVAL_COM,USART_FLAG_ORERR);
        rt_thread_mdelay(10);
    }

    return ch;
}
注意,这里的rt_thread_mdelay(10);是必须要有的,因为shell也是做为一个进程在OS中运行的,RTOS的进程不能一直占用CPU,所以,都是要添加延时的。
去掉board.c中static int uart_init(void)函数中的#error "TODO 2: Enable the hardware uart and config baudrate."
去掉finsh_port.c中RT_WEAK char rt_hw_console_getchar(void)函数中的#error "TODO 4: Read a char from the uart and assign it to 'ch'."
并添加相应 的头文件 ,#include "uart.h"
编译后烧写到板子上,串口输出如下,并使用了ps命令的结果。
下面就是要进行进程stack的优化了,从ps命令的显示可以看出,每个进程占用的stack的大小,这样就可以方便的进行调整,从而不浪费掉STACK,毕竟,这个芯片的RAM本来就很小,只有8K。
优化后的结果。
在如上的这种优化下,整个工程的RAM与ROM使用情况如下:
调试时,可以先给进程分配一个比较大的stack,等功能调试好后,通过ps看一下使用情况,再进行相应的调整,当然,要适当注意一下字节的对齐情况。


