前言
最近接触到 rust,鼓吹安全性和现代语言,宣称有接近 C 的性能,并且可以用于嵌入式开发,我比较感兴趣,遂上手试试。
安装
编辑器:https://code.visualstudio.com...
    vs code 插件:
        Chinese (Simplified) (简体中文)
        rust-analyzer
        Even Better TOML
        Error Lens
        Debugger for probe-rs
        crates
        C/C++
    rust:https://www.rust-lang.org/
    https://xxchang.github.io/book/intro/install.html 中文文档
    rust 下载 exe 后,默认安装就行了,不需要安装 nightly 版本
更新与卸载:
        rustup update
        rustup self uninstall
更换源,不然下载包特别慢,配置国内镜像,在用户名.cargo\config.toml下新增或新建以下内容:
        [source.crates-io]
        replace-with='rsproxy'
        [source.rsproxy]
        registry="https://rsproxy.cn/crates.io-index"
        [registries.rsproxy]
        index = "https://rsproxy.cn/crates.io-index"
        [net]
        git-fetch-with-cli = true
如果想使用 nightly 版本,可以像下面这样:
        rustc --version
        rustup install nightly
        rustup default nightly
安装编译支持:
        cargo install cargo-binutils
        rustup component add llvm-tools-preview
        cargo install cargo-generate
安装架构,看你 mcu 是什么架构,我这里选择 thumbv7em-none-eabihf:
        rustup target add thumbv6m-none-eabi     # 对于Cortex-M0/M0+/M1
        rustup target add thumbv7m-none-eabi     # 对于Cortex-M3
        rustup target add thumbv7em-none-eabi    # 对于Cortex-M4/M7(不带硬件浮点)
        rustup target add thumbv7em-none-eabihf  # 对于Cortex-M4F/M7F(带硬件浮点)
        rustup target add thumbv8m.base-none-eabi # 对于Cortex-M23
        rustup target add thumbv8m.main-none-eabi # 对于Cortex-M33(不带硬件浮点)
        rustup target add thumbv8m.main-none-eabihf # 对于Cortex-M33(带硬件浮点)
安装 probe-rs 工具:
        git clone https://github.com/probe-rs/probe-rs.git
        cd probe-rs
        cargo build --release --features cli # 生成的工具拷贝到 cargo 目录
        probe-rs chip list | grep -i gd32f427 # 不支持本芯片
        target-gen.exe pack .\GigaDevice.GD32F4xx_DFP.3.1.0.pack .\ # 生成 yaml 文件,拷贝到工程 targets 目录,重新编译
        probe-rs chip info GD32F427VK
        probe-rs list # 列出连接的调试器
        probe-rs info --probe 28e9:058f # 检测目标芯片信息 检测不到
        probe-rs reset --probe 28e9:058f --chip GD32F427VK # 可以复位芯片
        probe-rs read b32 0x08000000 2 --chip gd32f427vk --probe 28e9:058f # 可以读取信息
到目前为止,该安装的环境已经安装完成了,可以进行开发了。
开发
开发 gd32f427vkt6,发现没有对应的芯片支持:
cargo search gd32f4 # 查看芯片支持
创建工程:
        cargo generate --git https://github.com/rust-embedded/cortex-m-quickstart
        Project Name: hello_rust
生成 pac 库,在 hello_rust 同级目录下:
        cargo install svd2rust
        cargo install form
        cargo new --lib gd32f4xx-pac
        cd .\gd32f4xx-pac\ # 手动删除 src 目录
        svd2rust -i GD32F4xx.svd
        form -i lib.rs -o src/ # 手动删除 svd2rust 生成的 lib.rs
        cargo fmt
在 .cargo\config.toml 文件,启用目标架构,我的是:
target = "thumbv7em-none-eabihf" # Cortex-M4F and Cortex-M7F (with FPU)
在 .vscode\launch.json 文件,增加调试内容:
        {
            "type": "probe-rs-debug",
            "request": "launch",
            "name": "probe-rs Test",
            "cwd": "",
            //!MODIFY (or remove)
            "speed": 24000,
            //!MODIFY (or remove)
            "probe": "28e9:058f",
            "runtimeExecutable": "probe-rs",
            "runtimeArgs": ["dap-server"],
            "connectUnderReset": false,
            "chip": "GD32F427VK",
            "flashingConfig": {
                "flashingEnabled": true,
                "haltAfterReset": true
            },
            "coreConfigs": [
                {
                    "coreIndex": 0,
                    "programBinary": "./target/thumbv7em-none-eabihf/debug/hello-rust"
                }
            ]
        },

    src\main.rs 内容如下:
            #![no_std]
            #![no_main]

            // pick a panicking behavior
            use panic_halt as _; // you can put a breakpoint on `rust_begin_unwind` to catch panics
                                 // use panic_abort as _; // requires nightly
                                 // use panic_itm as _; // logs messages over ITM; requires ITM support
                                 // use panic_semihosting as _; // logs messages to the host stderr; requires a debugger

            use cortex_m::asm;
            use cortex_m_rt::entry;

            #[allow(unused_imports)]
            use cortex_m::delay::Delay;
            #[allow(unused_imports)]
            use gd32f4xx_pac::Peripherals;
            use rtt_target::{rprintln, rtt_init_print};

            #[entry]
            fn main() -> ! {
                asm::nop(); // To not have main optimize to abort in release mode, remove when you add code

                let periph = Peripherals::take().unwrap();
                let rcu = periph.RCU;

                // - enable the led clock, GPIOC
                rcu.ahb1en().modify(|_, w| w.pcen().set_bit());

                // - configure led GPIO port
                //   LED = PA1
                let led = periph.GPIOC;
                // #define GPIO_MODE_INPUT            CTL_CLTR(0)           /*!< input mode */
                // #define GPIO_MODE_OUTPUT           CTL_CLTR(1)           /*!< output mode */
                // #define GPIO_MODE_AF               CTL_CLTR(2)           /*!< alternate function mode */
                // #define GPIO_MODE_ANALOG           CTL_CLTR(3)           /*!< analog mode */
                //   MODE = OUTPUT
                led.ctl().modify(|_, w| unsafe { w.ctl6().bits(1) });
                // GPIO_PUPD_NONE = 0
                // GPIO_PUPD_PULLUP = 1
                // GPIO_PUPD_PULLDOWN = 2
                led.pud().modify(|_, w| unsafe { w.pud6().bits(0) });
                //   OMODE = 0, PushPull
                led.omode().modify(|_, w| w.om6().clear_bit());

                // gpio pin output speed: over GPIO_OSPEED_50MHZ
                led.ospd().modify(|_, w| unsafe { w.ospd6().bits(0x03) });

                led.bop().write(|w| w.bop6().set_bit());
                // gpioa.bc().write(|w| w.cr6().set_bit());

                let core = cortex_m::Peripherals::take().unwrap();
                let systick = core.SYST;
                let mut delay = Delay::new(systick, 16_000_000);

                rtt_init_print!(); // 初始化RTT

                let mut no = 0;

                loop {
                    delay.delay_ms(1_000);

                    led.tg().write(|w| w.tg6().set_bit());
                    rprintln!("hello rust on gd32f427v-start:{}", no);
                    no += 1;
                    // panic!("Oops");
                }
            }
memory.x 文件内容如下: MEMORY
{
/* NOTE 1 K = 1 KiBi = 1024 bytes */
/* TODO Adjust these memory regions to match your device memory layout */
/* These values correspond to the LM3S6965, one of the few devices QEMU can emulate */
FLASH : ORIGIN = 0x08000000, LENGTH = 256K
RAM : ORIGIN = 0x20000000, LENGTH = 64K
}
/* This is where the call stack will be allocated. */
/* The stack is of the full descending type. */
/* You may want to use this variable to locate the call stack and static
variables in different memory regions. Below is shown the default value */
/* _stack_start = ORIGIN(RAM) + LENGTH(RAM); */
/* You can use this symbol to customize the location of the .text section */
/* If omitted the .text section will be placed right after the .vector_table
section */
/* This is required only on microcontrollers that store some configuration right
after the vector table */
/* _stext = ORIGIN(FLASH) + 0x400; */
/* Example of putting non-initialized variables into custom RAM locations. */
/* This assumes you have defined a region RAM2 above, and in the Rust
sources added the attribute `#[link_section = ".ram2bss"]` to the data
you want to place there. */
/* Note that the section will not be zero-initialized by the runtime! */
/* SECTIONS {
.ram2bss (NOLOAD) : ALIGN(4) {
*(.ram2bss);
. = ALIGN(4);
} > RAM2
} INSERT AFTER .bss;
*/
REGION_ALIAS("REGION_TEXT", FLASH);
REGION_ALIAS("REGION_RODATA", FLASH);
REGION_ALIAS("REGION_DATA", RAM);
REGION_ALIAS("REGION_BSS", RAM);
REGION_ALIAS("REGION_HEAP", RAM);
REGION_ALIAS("REGION_STACK", RAM); 编译:
cargo build --release # 发布版本
cargo objcopy --release -- -O binary firmware.bin
cargo build # debug 版本
cargo objcopy -- -O binary firmware.bin
下载、调试:
probe-rs run --probe 28e9:058f --chip GD32F427vk .\target\thumbv7m-none-eabi\release\hello-rust
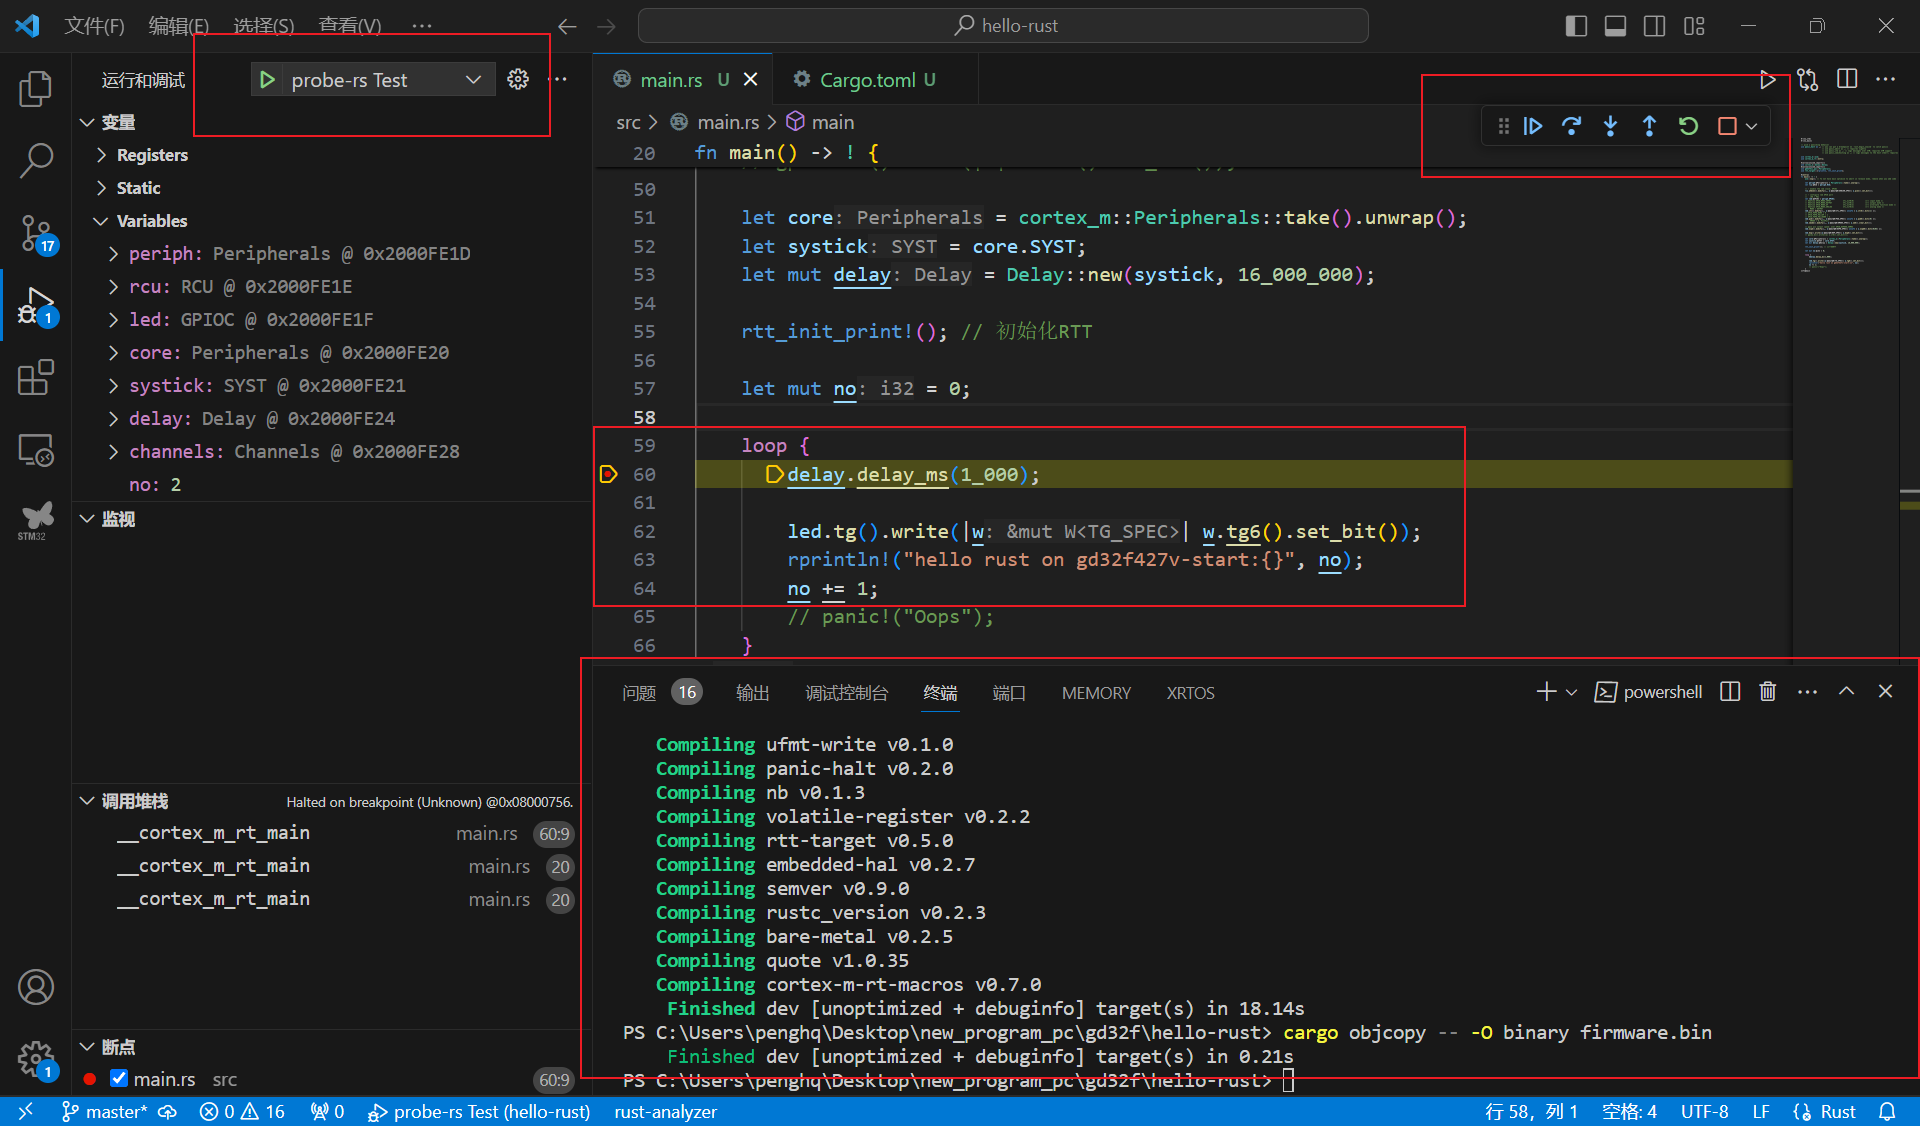
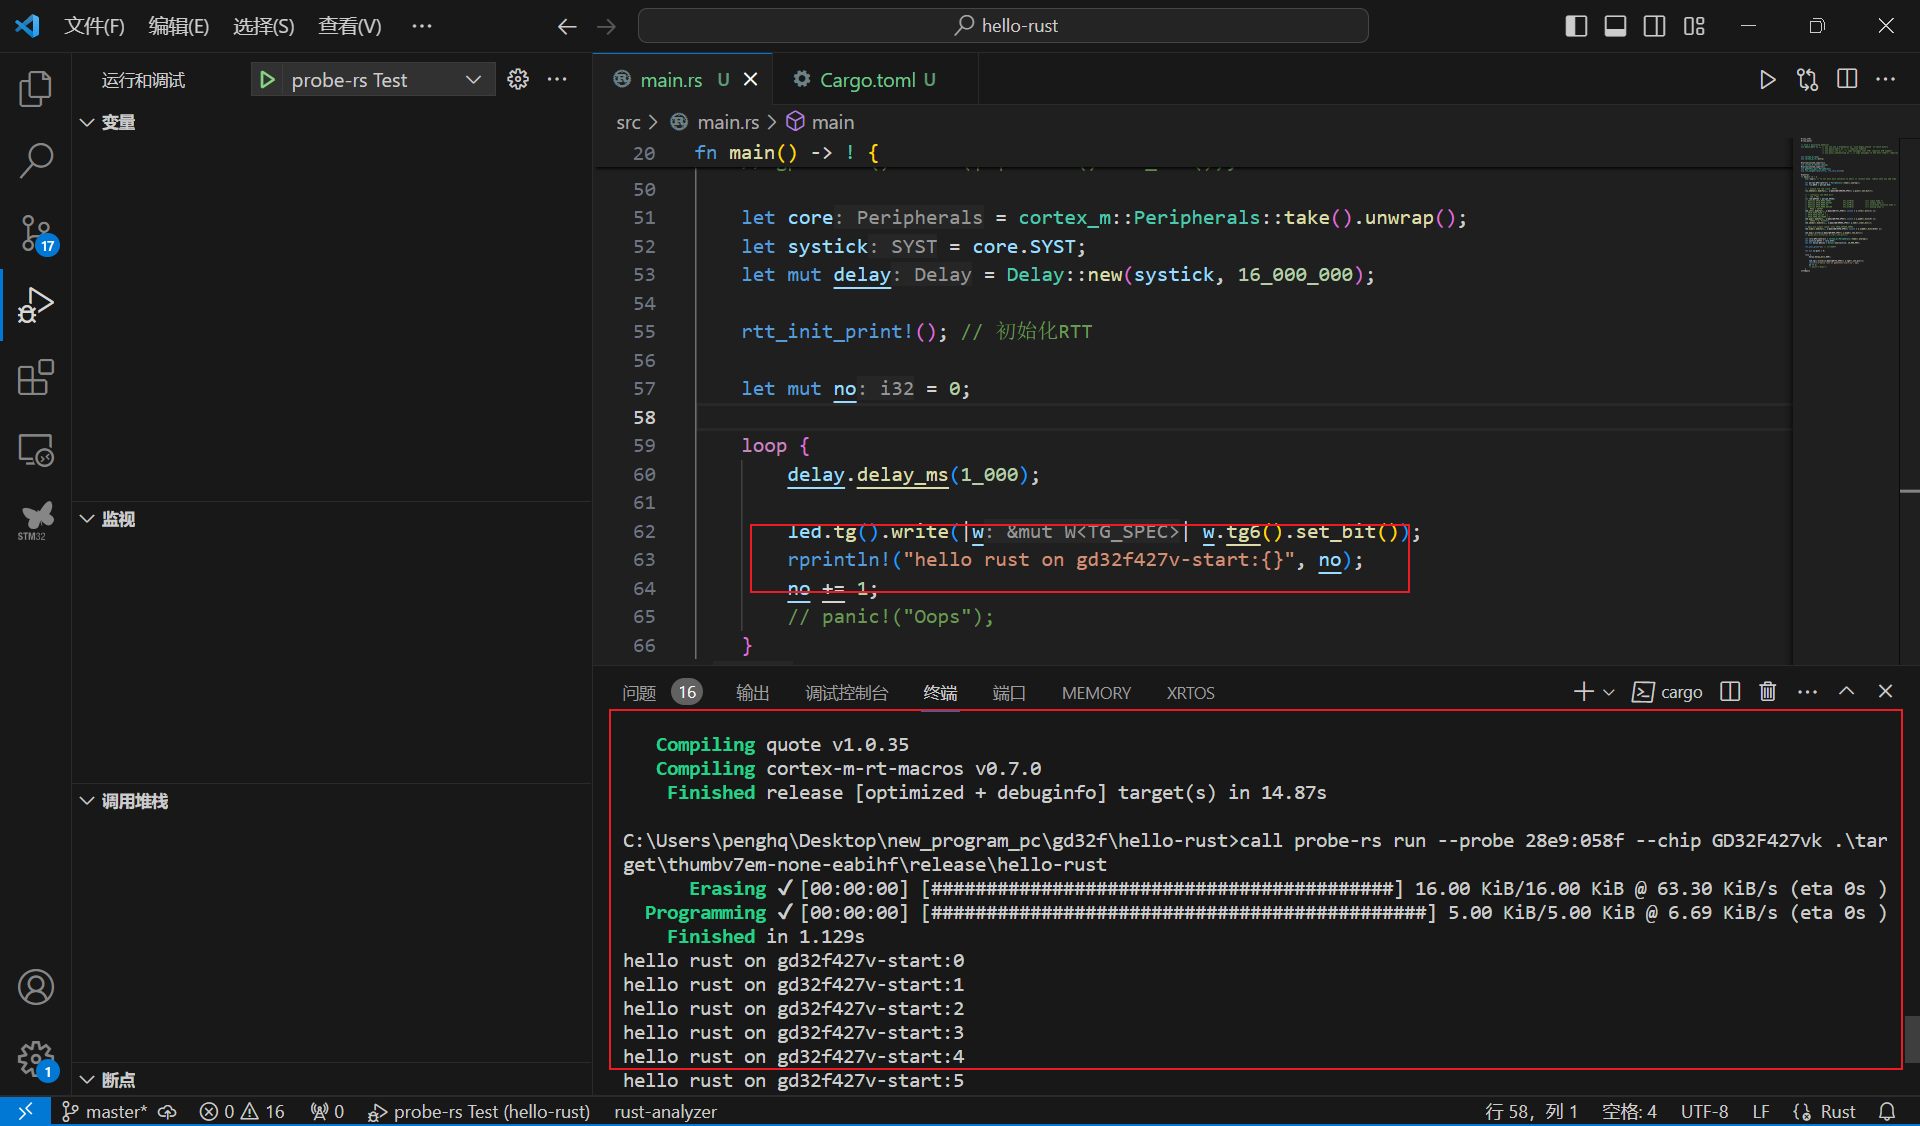
上面的代码功能为 点灯+rtt 打印,我发现进行代码调试的时候,没有 rtt 打印信息,上图:
结语
踩了很多坑,对我启发比较大的是本站的 gd32f310 开发板评测的一位大佬的帖子,可惜在本站上没找到,是在其他站点转载看到的,非常感谢各位先行的前辈。
总的来说,这次体验是不错的,新增不支持的芯片比较快捷,只不过 pac 编程还得看手册,是比较麻烦的,希望诸多厂家把社区搞起来,hal 丰富起来了,咱们才方便不是吗。
最后,祝 rust 越来越好!


