模型与流程
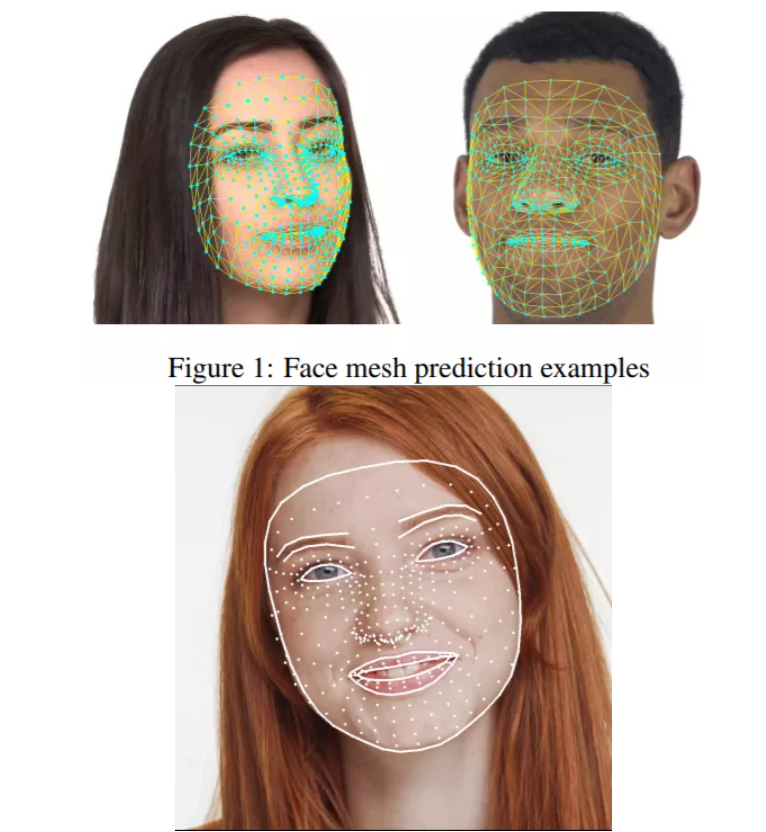
上一篇文章介绍了MediaPipe中手势关键点检测与简单的手势识别,本文介绍如何试用MediaPipe实现人脸3D点云数据提取,提取的数据为人脸468点位, 相关的论文来自这里:
https://arxiv.org/pdf/1907.06724.pdf
https://arxiv.org/pdf/2006.10962.pdf
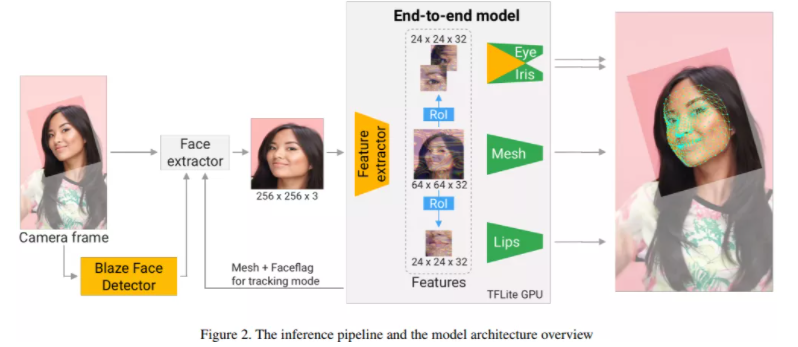
整个流程如下:
输的468点是3D坐标,值在0~1之间,其中z表示深度,Python函数支持下面的参数配置:
max_num_faces 默认为1,表示支持最大人脸检测数目
min_detection_confidence 最小检测置信度,默认0.5
min_tracking_confidence 最小跟踪置信度,默认0.5
人脸3D点云提取
基于MediaPipe的python版本函数,在官方教程的基础上,我稍微修改了一下,代码如下:
import cv2
import mediapipe as mp
mp_drawing = mp.solutions.drawing_utils
mp_face_mesh = mp.solutions.face_mesh


# For webcam input:
drawing_spec = mp_drawing.DrawingSpec(thickness=1, circle_radius=1)
cap = cv2.VideoCapture("D:/images/video/face_mesh.mp4")
with mp_face_mesh.FaceMesh(
    max_num_faces=4,
    min_detection_confidence=0.5,
    min_tracking_confidence=0.5) as face_mesh:
  while cap.isOpened():
    success, frame = cap.read()
    if not success:
      print("Ignoring empty camera frame.")
      # If loading a video, use 'break' instead of 'continue'.
      break

    h, w, c = frame.shape
    image = cv2.resize(frame, (w //2, h//2))
    # To improve performance, optionally mark the image as not writeable to
    # pass by reference.
    image = cv2.cvtColor(image, cv2.COLOR_BGR2RGB)
    results = face_mesh.process(image)

    # Draw the face mesh annotations on the image.
    image = cv2.cvtColor(image, cv2.COLOR_RGB2BGR)
    if results.multi_face_landmarks:
      for face_landmarks in results.multi_face_landmarks:
        mp_drawing.draw_landmarks(
            image=image,
            landmark_list=face_landmarks)
        mp_drawing.draw_landmarks(
            image=image,
            landmark_list=face_landmarks)
        mp_drawing.draw_landmarks(
            image=image,
            landmark_list=face_landmarks
        )
    # Flip the image horizontally for a selfie-view display.
    cv2.imshow('MediaPipe Face Mesh', image)
    if cv2.waitKey(5) & 0xFF == 27:
      break
cap.release()
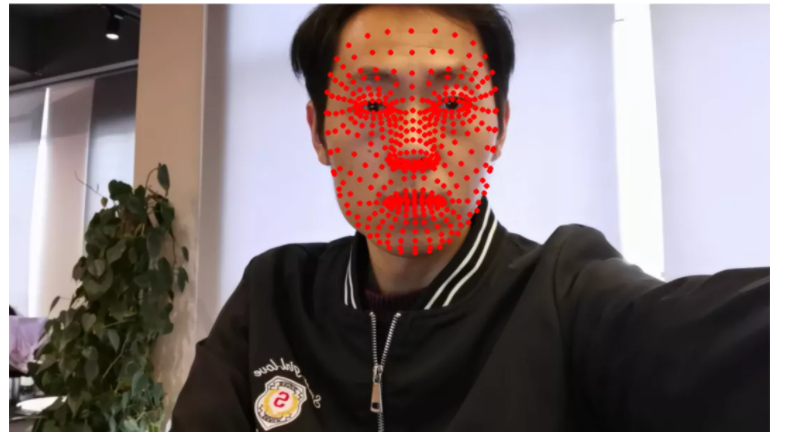
运行结果如下:
原文链接:OpenCV开发者联盟
作者:2号高手
推荐阅读
更多嵌入式AI技术相关内容请关注嵌入式AI专栏。


