【X806开发板试用】PWM呼吸灯、无刷电调、按键测试样例
环境配置
通过我上篇文章:【XR806开发板试用】Ubuntu环境配置,将配置摸清楚后,就可以开始愉快的编写代码了😄
视频演示
https://www.bilibili.com/vide...
https://www.bilibili.com/vide...
https://www.bilibili.com/vide...
编写思路
寻找使用
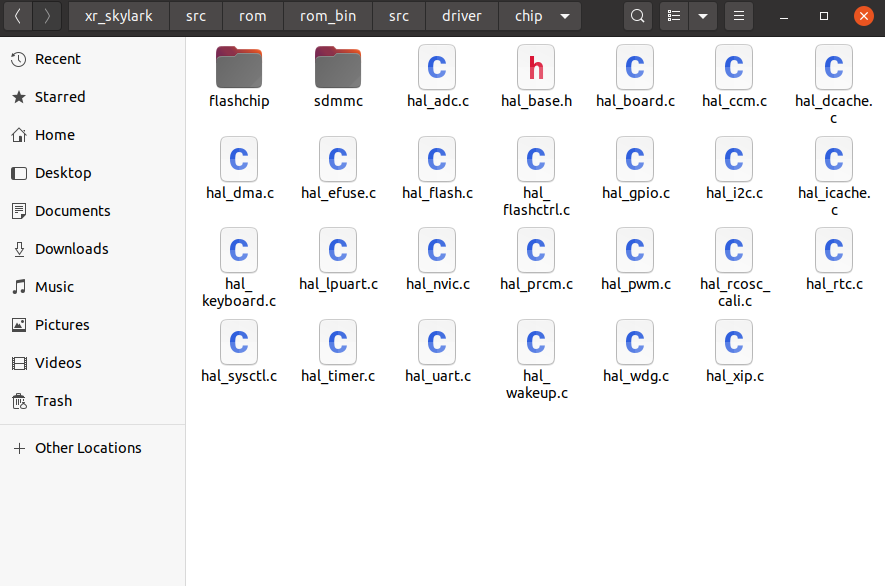
为了节省更多的flash空间,在xr872/xr808/xr806芯片上把大部分的驱动都已经做了rom化处理,即出厂的时候已经把外设驱动都集成到rom当中,因此默认sdk中驱动的代码是不能修改的。而客户有时候调试需要在驱动层添加一些打印信息或者修改外设驱动的配置,此时则需要舍弃rom化的驱动,自己在源代码上添加相应的驱动了。
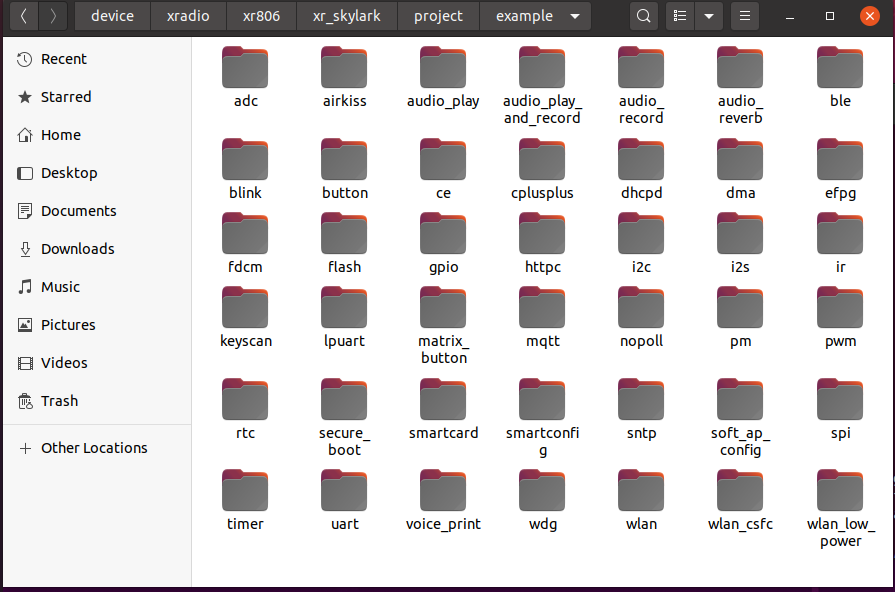
文件中还提供一下模板可以供我们参考:
寻找一些预定义
代码部分
PWM文件夹BUILD.gn
import("//device/xradio/xr806/liteos_m/config.gni")     #必须,config中定义了头文件路径和关键宏定义

static_library("app_pwm") {
   configs = []

   sources = [
  "main.c",
   ]

   cflags = board_cflags

   include_dirs = board_include_dirs
   include_dirs += [
    ".",
    "//base/iot_hardware/peripheral/interfaces/kits",
    "//device/xradio/xr806/xr_skylark/project",
   ]
}
PWM文件夹下main.c
#include <stdio.h>
#include "ohos_init.h"
#include "kernel/os/os.h"
#include "iot_gpio.h"
#include "driver/chip/hal_pwm.h"
static OS_Thread_t g_main_thread;
#define PWM_OUTPUT_CHL PWM_GROUP1_CH2
#define PWM_OUTPUT_MODE PWM_CYCLE_MODE
#define GPIO_INPUT_PORT GPIO_PORT_A
#define GPIO_INPUT_PIN GPIO_PIN_11
int max_duty_ratio=0;
static void gpio_input_init(void)
{
GPIO_InitParam param;
param.driving = GPIO_DRIVING_LEVEL_1;
param.mode = GPIOx_Pn_F0_INPUT;
param.pull = GPIO_PULL_NONE;
HAL_GPIO_Init(GPIO_INPUT_PORT, GPIO_INPUT_PIN, ¶m);
}
static uint8_t gpio_input_read(void)
{
return (uint8_t)HAL_GPIO_ReadPin(GPIO_INPUT_PORT, GPIO_INPUT_PIN);
}
static void gpio_input_deinit(void)
{
HAL_GPIO_DeInit(GPIO_INPUT_PORT, GPIO_INPUT_PIN);
}
static void gpio_input_test(void)
{
printf("gpio input test start.\n");
gpio_input_init();
uint8_t i;
for (i = 0; i < 10; i++) {
printf("gpio level: %d\n", gpio_input_read());
OS_MSleep(500);
}
}
static void pwm_cycle_mode_Set(void)
{
HAL_Status status = HAL_ERROR;
PWM_ClkParam clk_param;
PWM_ChInitParam ch_param;
clk_param.clk = PWM_CLK_HOSC;
clk_param.div = PWM_SRC_CLK_DIV_1;
status = HAL_PWM_GroupClkCfg(PWM_OUTPUT_CHL, &clk_param);
if (status != HAL_OK)
printf("%s(): %d, PWM group clk config error\n", __func__, __LINE__);
ch_param.hz = 50;
ch_param.mode = PWM_OUTPUT_MODE;
ch_param.polarity = PWM_HIGHLEVE;
max_duty_ratio = HAL_PWM_ChInit(PWM_OUTPUT_CHL, &ch_param);
if (max_duty_ratio == -1)
printf("%s(): %d, PWM ch init error\n", __func__, __LINE__);
printf("max_duty_ratio=%d\n", max_duty_ratio);
status = HAL_PWM_ChSetDutyRatio(PWM_OUTPUT_CHL, 0);
if (status != HAL_OK)
printf("%s(): %d, PWM set duty ratio error\n", __func__, __LINE__);
status = HAL_PWM_EnableCh(PWM_OUTPUT_CHL, PWM_OUTPUT_MODE, 1);
if (status != HAL_OK)
printf("%s(): %d, PWM ch enable error\n", __func__, __LINE__);
}
static void key_scan(void)
{
HAL_Status status = HAL_ERROR;
if(!gpio_input_read())
{
status = HAL_PWM_ChSetDutyRatio(PWM_OUTPUT_CHL, 10* max_duty_ratio /100);
if (status != HAL_OK)
printf("%s(): %d, PWM set duty ratio error\n", __func__, __LINE__);
}else {
status = HAL_PWM_ChSetDutyRatio(PWM_OUTPUT_CHL, 5* max_duty_ratio /100);
if (status != HAL_OK)
printf("%s(): %d, PWM set duty ratio error\n", __func__, __LINE__);
}
}
static void MainThread(void *arg)
{
HAL_Status status = HAL_ERROR;
//printf("LED_PWM test start\r\n");
pwm_cycle_mode_Set();
gpio_input_init();
OS_MSleep(10);
//printf("gpio input test start.\n");
status = HAL_PWM_ChSetDutyRatio(PWM_OUTPUT_CHL, 5* max_duty_ratio /100);
if (status != HAL_OK)
printf("%s(): %d, PWM set duty ratio error\n", __func__, __LINE__);
while (1) {
key_scan();
/*
for(int i=0;i<=100;i++)
{
status = HAL_PWM_ChSetDutyRatio(PWM_OUTPUT_CHL, i * max_duty_ratio /100);
if (status != HAL_OK)
printf("%s(): %d, PWM set duty ratio error\n", __func__, __LINE__);
OS_MSleep(30);
}
for(int i=100;i>0;i--)
{
status = HAL_PWM_ChSetDutyRatio(PWM_OUTPUT_CHL, i * max_duty_ratio /100);
if (status != HAL_OK)
printf("%s(): %d, PWM set duty ratio error\n", __func__, __LINE__);
OS_MSleep(30);
}
*/
}
}
void PWMMain(void) {
if (OS_ThreadCreate(&g_main_thread, "MainThread", MainThread, NULL, OS_THREAD_PRIO_APP, 4 * 1024) != OS_OK) {
printf("[ERR] Create MainThread Failed\n");
}
}
SYS_RUN(PWMMain);上层BUILD.gn
group("ohosdemo") {
    deps = [
        #"hello_demo:app_hello",
        #"LED:app_IO",
        #"iot_peripheral:app_peripheral",
        #"wlan_demo:app_WlanTest",
        "PWM:app_pwm",
    ]
}
固件文件
(https://musetransfer.com/s/4y...)](链接文件(有效期至2022年12月24日))
总结
通过最近的学习,也逐渐对这块板子熟悉起来,等过段时间再来和大家分享我所学,本期就到这里😄。


![]G209H83(Y3H}R{_VNLG1GR.png ]G209H83(Y3H}R{_VNLG1GR.png](/img/bVbm7O)
![]]496WC5Q94$RQU]KNWUJLW.png ]]496WC5Q94$RQU]KNWUJLW.png](/img/bVbm7N)

