1 TinyUSB(UAC)音频简介
UAC是USB Audio Class的缩写,USB音频类,一个像USB这样的通用数据接口,可以有很多种实现数字音频数据传输的方式。不同的开发者可以根据自己的喜好和需求,定义任意的控制方式,传输模式,音频格式等等参数。
在上一节我们在MM32F0163D7P 平台上成功的移植了TinyUSB,基于这个平台,今天我们来实现一个 uac2_headset 音频设备,这个设备支持基础的录音和放音功能,如果要支持音量调节/静音功能,还需要再添加一个 HID 变成复合设备。
2 快速移植一个UAC+HID复合设备
按照前面两篇文章,我们可以快速的移植出一个基于TinyUSB的UAC+HID复合设备,主要的代码片段如下:
/*------------- MAIN -------------*/
int main(void)
{
  USB_DeviceClockInit();//board_init();

  CONSOLE_Init(460800);  //enable printf debug

  // init device stack on configured roothub port
  tud_init(BOARD_TUD_RHPORT);

  TU_LOG1("UAC Headset & HID running\r\n");   // CFG_TUSB_DEBUG for debugging #if CFG_TUSB_DEBUG
// 0 : no debug
// 1 : print error
// 2 : print warning
// 3 : print info

  while (1)
  {
    tud_task(); // TinyUSB device task
    audio_task();
    hid_task();
  }

  return 0;
}
#define EPNUM_AUDIO_IN 0x01
#define EPNUM_AUDIO_OUT 0x01
#define EPNUM_HID 0x03
uint8_t const desc_configuration[] =
{
// Interface count, string index, total length, attribute, power in mA
TUD_CONFIG_DESCRIPTOR(1, ITF_NUM_TOTAL, 0, CONFIG_TOTAL_LEN, TUSB_DESC_CONFIG_ATT_REMOTE_WAKEUP, 100),
// Interface number, string index, EP Out & EP In address, EP size
TUD_AUDIO_HEADSET_STEREO_DESCRIPTOR(2, EPNUM_AUDIO_OUT, EPNUM_AUDIO_IN | 0x80),
// Interface number, string index, protocol, report descriptor len, EP Out & In address, size & polling interval
TUD_HID_INOUT_DESCRIPTOR(ITF_NUM_HID, 6, HID_ITF_PROTOCOL_NONE, sizeof(desc_hid_report), EPNUM_HID, 0x80 | EPNUM_HID, CFG_TUD_HID_EP_BUFSIZE, 10),
};//--------------------------------------------------------------------+
// String Descriptors
//--------------------------------------------------------------------+
// array of pointer to string descriptors
char const* string_desc_arr [] =
{
(const char[]) { 0x09, 0x04 }, // 0: is supported language is English (0x0409)
"TinyUSB", // 1: Manufacturer
"TinyUSB headset", // 2: Product
"000001", // 3: Serials, should use chip ID
"TinyUSB Speakers", // 4: Audio Interface
"TinyUSB Microphone", // 5: Audio Interface
"TinyUSB HID", // 6: HID Interface
};
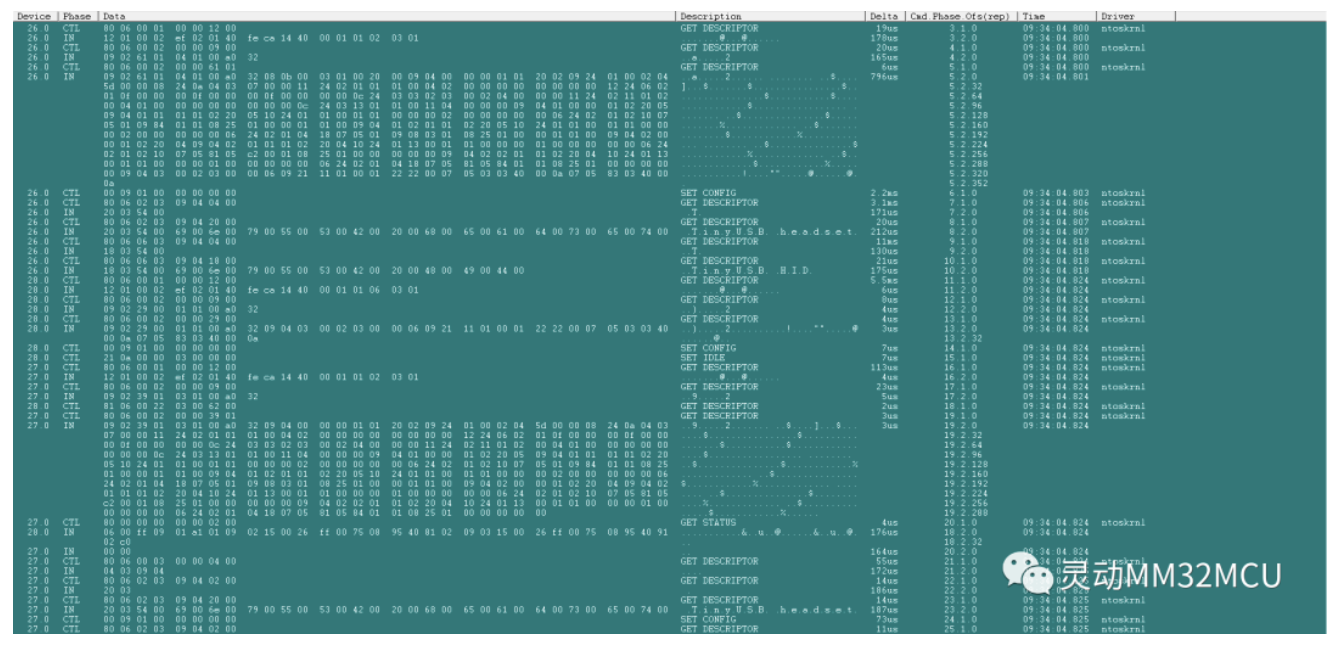
图1 枚举过程
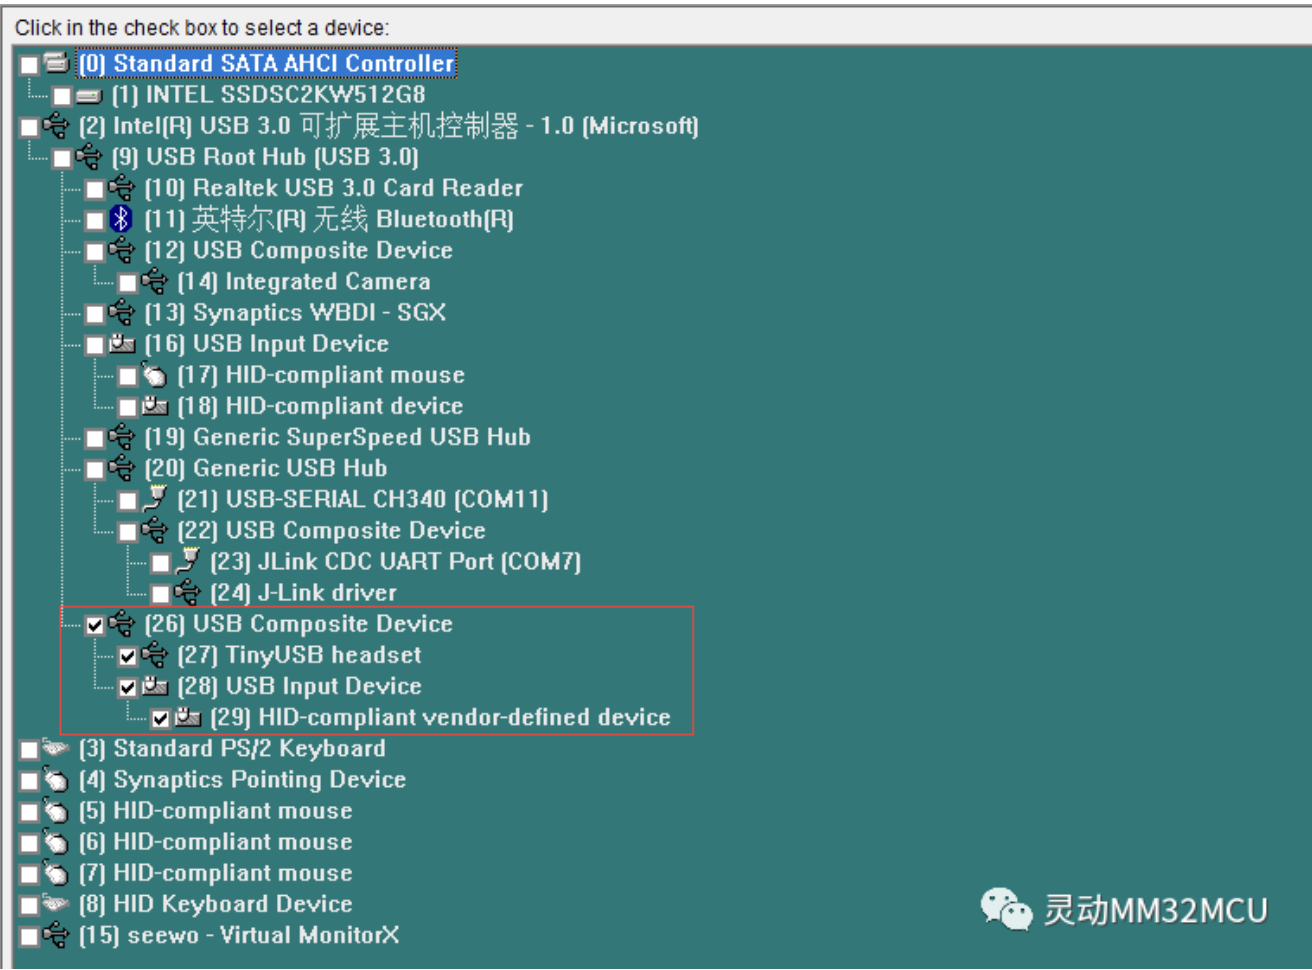
图2 枚举设备
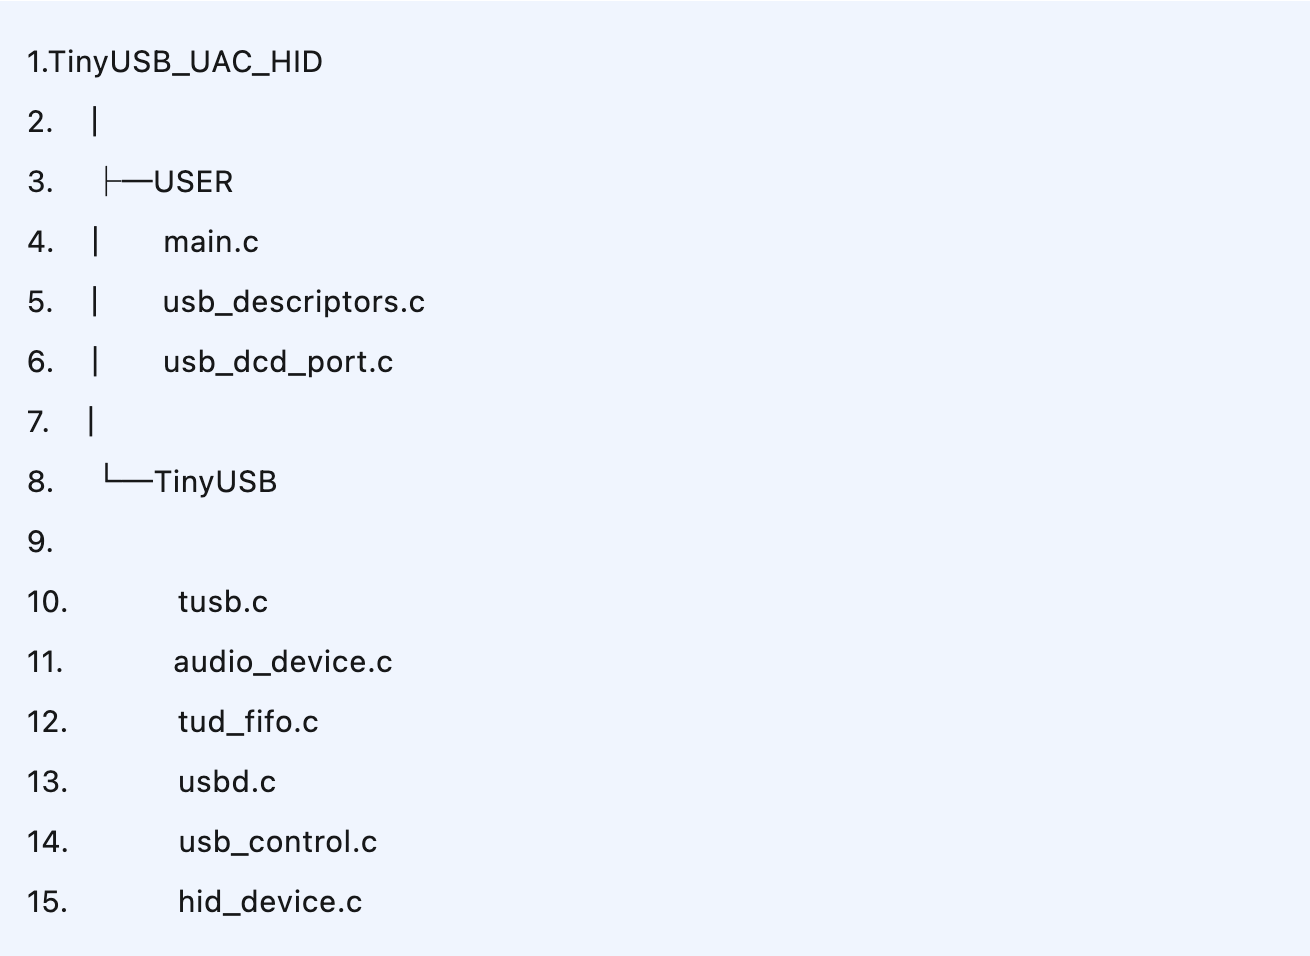
工程文件树:
3 耳机设备设置修改音量
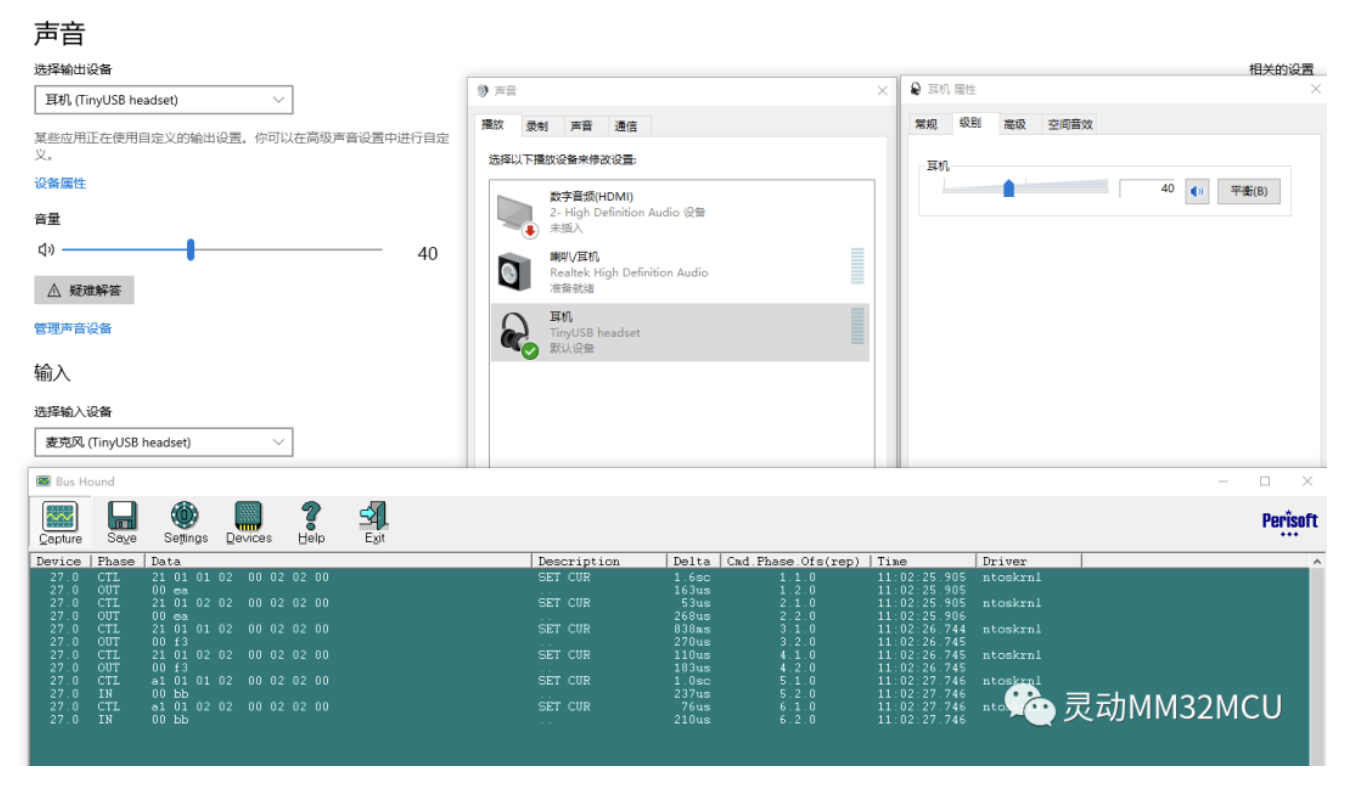
在耳机属性里面可以操作修改音量大小,同时通过抓包工具可以抓到主机下发的SET CUR命令。
图3 设置音量
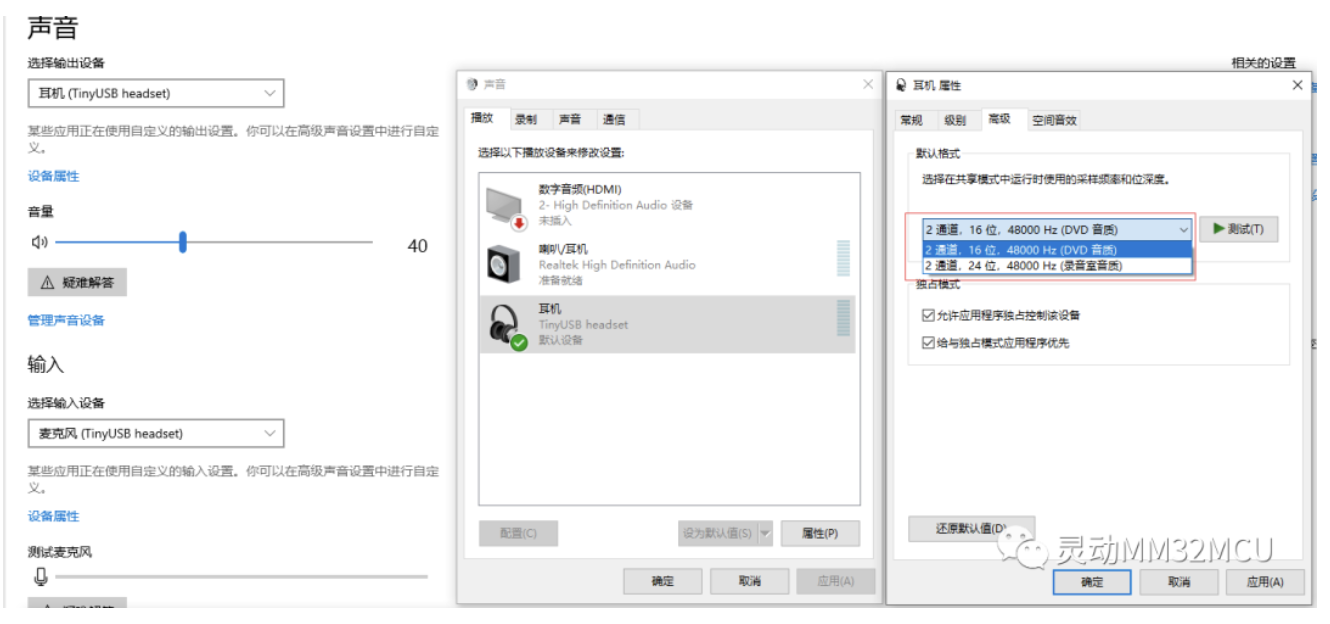
4 耳机设备设置修改采样频率和位深度
在耳机属性高级里面默认格式可以看到下拉框有两种格式,一个是2通道 16位48000Hz,另外一个是2通道 24位 48000Hz,播放声音下发ISOC包的时候根据这个选择传输。
图4 设置采样频率和位深度
通过设置,下位机可以在播放或者录音时处理不同的采样频率和位深度。样例中全局变量current_resolution是位深度,current_sample_rate是采样频率。
5 音频数据的收发处理
播放时ISOC下发的数据包缓存在spk_buf里面。
录用时麦克风的声音采样数据写入mic_buf,通过ISOC同步上传到电脑端。(例程是将播放的数据包处理后通过接口又返回电脑端,由tud_audio_write((uint8_t * ) mic_buf, (uint16_t) (spk_data_size / 2))实现)
//--------------------------------------------------------------------+
// AUDIO Task
//--------------------------------------------------------------------+

void audio_task(void)
{
  // When new data arrived, copy data from speaker buffer, to microphone buffer
  // and send it over
  // Only support speaker & headphone both have the same resolution
  // If one is 16bit another is 24bit be care of LOUD noise !
  if (spk_data_size)
  {
    if (current_resolution == 16)
    {
      int16_t *src = (int16_t*)spk_buf;
      int16_t *limit = (int16_t*)spk_buf + spk_data_size / 2;
      int16_t *dst = (int16_t*)mic_buf;
      while (src < limit)
      {
        // Combine two channels into one
        int32_t left = *src++;
        int32_t right = *src++;
        *dst++ = (int16_t) ((left >> 1) + (right >> 1));
      }
      memset(mic_buf,0xCC,sizeof(mic_buf));  //mm32 test code
      tud_audio_write((uint8_t *)mic_buf, (uint16_t) (spk_data_size / 2));
      spk_data_size = 0;
    }
    else if (current_resolution == 24)
    {
      int32_t *src = spk_buf;
      int32_t *limit = spk_buf + spk_data_size / 4;
      int32_t *dst = mic_buf;
      while (src < limit)
      {
        // Combine two channels into one
        int32_t left = *src++;
        int32_t right = *src++;
        *dst++ = (int32_t) ((uint32_t) ((left >> 1) + (right >> 1)) & 0xffffff00ul);
      }
      tud_audio_write((uint8_t *)mic_buf, (uint16_t) (spk_data_size / 2));
      spk_data_size = 0;
    }
  }
}
6 功能验证测试
将uac2_headset 音频设备插入PC,在计算机管理->设备管理器->音频输入和输出里面出现耳机和麦克风两个TinyUSB headset设备证明枚举成功。
图5 设备管理器音频设备
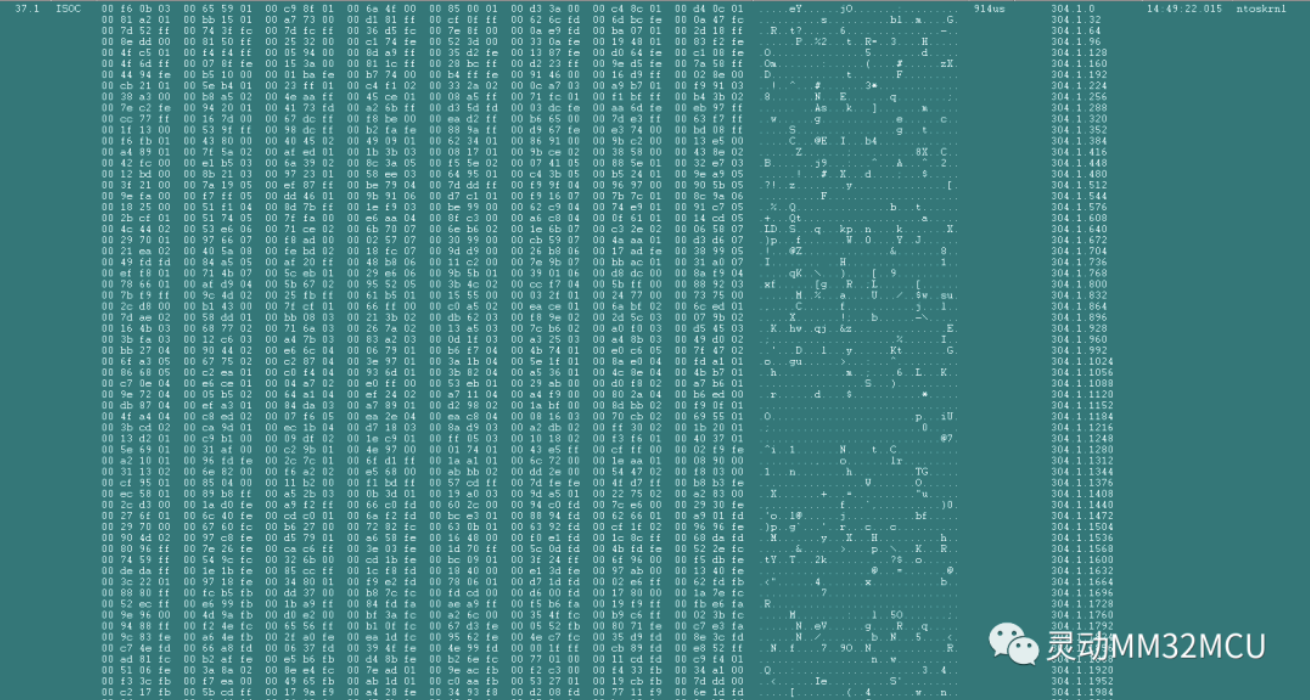
电脑端播放音乐使用抓包工具抓到ISOC的数据包:
图6 ISOC数据包
作者:灵动MM32MCU
文章来源:灵动MM32MCU
推荐阅读
- 调试USB设备低功耗应用的开发笔记(上篇)
- 使用GUI Guider工具开发嵌入式GUI应用(6)-切换多screen换场景
- 使用GUI Guider工具开发嵌入式GUI应用(5)-使用timer对象显示动画
- 使用GUI Guider工具开发嵌入式GUI应用(4)-使用image组件
- 使用GUI Guider工具开发嵌入式GUI应用 (3) - 使用label组件
更多MM32F5系列资料请关注灵动MM32 MCU专栏。如想进行MM32相关芯片技术交流,请添加极术小姐姐微信(id:aijishu20)加入微信群。

