Android Neural Networks API (NNAPI) 是一个 Android C API,专门为在移动设备上针对机器学习运行计算密集型运算而设计。NNAPI 旨在为编译和训练神经网络的更高级机器学习框架(例如TensorFlow Lite、Caffe2 等)提供一个基础的功能层。该 API 适用于运行 Android 8.1(API 级别 27)或更高版本的所有设备。对NNAPI的设计使用感兴趣的,可以参考链接。
我们这里进行试验的设备是RK3399开发板,系统为android-8.1,系统支持NNAPI 1.0。另外必须确保该系统已经打好NNAPI的驱动,否则在android-tflite中开启NNAPI时,会默认切换成CPU运行,效率低。我们再进行模型训练的时候,使用的是tensorflow-keras。
模型设计
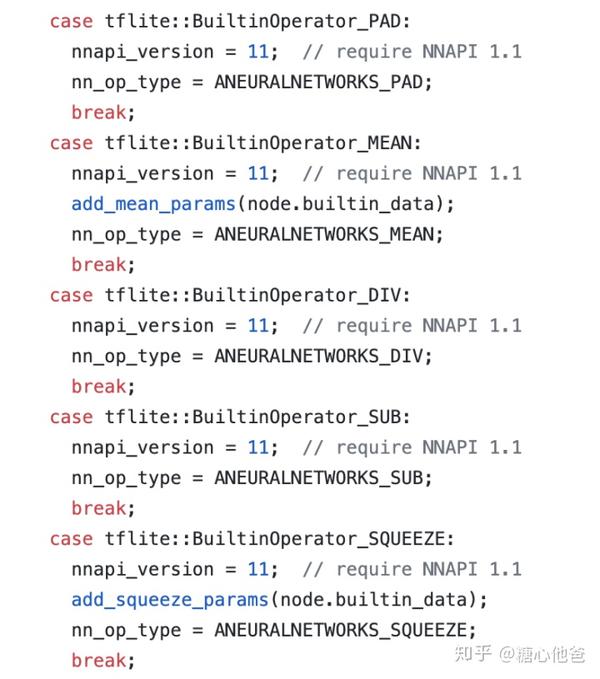
在进行模型设计的时候,我们还是需要去考虑一个问题:避免引入NNAPI不支持的Op。举个例子,我们要进行Mobilenet的分类器模型训练,官方的代码可参考链接,我们同时贴出NNAPI 1.0中不支持的Op,可以参考下图:

NNAPI 1.0 不支持的Op
细心的可以发现,官方给出的Mobilenet的实现,使用了PAD、SQUEEZE、Reshape这两个Op(其实SOFTMAX和GlobalAveragePooling2D也是不支持的),这几个Op是官方给出来不予以支持的。如果你直接使用官方代码提供的网络来训练模型,那么该模型是无法进行tflite-android的NNAPI加速的。所以,我要进行网络修改,移除这些NNAPI不支持的Op。下面是修改后的代码块,第一个是卷积块:
def _conv_block(inputs, filters, alpha, kernel=(3, 3), strides=(1, 1)):
    # channel_axis = 1 if backend.image_data_format() == 'channels_first' else -1
    channel_axis = -1
    filters = int(filters * alpha)
    # x = layers.ZeroPadding2D(padding=((0, 1), (0, 1)), name='conv1_pad')(inputs)
    x = layers.Conv2D(filters, kernel,
                      padding='same',
                      use_bias=False,
                      strides=strides,
                      name='conv1')(inputs)
    x = layers.BatchNormalization(axis=channel_axis, name='conv1_bn')(x)
    return layers.ReLU(6., name='conv1_relu')(x)
第二个是depthwise卷积块:
def _depthwise_conv_block(inputs, pointwise_conv_filters, alpha,
                          depth_multiplier=1, strides=(1, 1), block_id=1):
    # channel_axis = 1 if backend.image_data_format() == 'channels_first' else -1
    channel_axis = -1
    pointwise_conv_filters = int(pointwise_conv_filters * alpha)

    # if strides == (1, 1):
    #     x = inputs
    # else:
    #     x = layers.ZeroPadding2D(((0, 1), (0, 1)),
    #                              name='conv_pad_%d' % block_id)(inputs)
    x = inputs
    x = layers.DepthwiseConv2D((3, 3),
                               padding='same',
                               depth_multiplier=depth_multiplier,
                               strides=strides,
                               use_bias=False,
                               name='conv_dw_%d' % block_id)(x)
    x = layers.BatchNormalization(
        axis=channel_axis, name='conv_dw_%d_bn' % block_id)(x)
    x = layers.ReLU(6., name='conv_dw_%d_relu' % block_id)(x)

    x = layers.Conv2D(pointwise_conv_filters, (1, 1),
                      padding='same',
                      use_bias=False,
                      strides=(1, 1),
                      name='conv_pw_%d' % block_id)(x)
    x = layers.BatchNormalization(axis=channel_axis, name='conv_pw_%d_bn' % block_id)(x)
    return layers.ReLU(6., name='conv_pw_%d_relu' % block_id)(x)
最后是整体的网络构建
def MobileNetBase(
              img_input=None,
              alpha=1.0,
              depth_multiplier=1,
              dropout=1e-3,
              include_top=True,
              input_tensor=None,
              pooling=None,
              name = "input"):

    x = _conv_block(img_input, 32, alpha, strides=(2, 2))
    x = _depthwise_conv_block(x, 64, alpha, depth_multiplier, block_id=1)

    x = _depthwise_conv_block(x, 128, alpha, depth_multiplier,
                              strides=(2, 2), block_id=2)
    x = _depthwise_conv_block(x, 128, alpha, depth_multiplier, block_id=3)

    x = _depthwise_conv_block(x, 256, alpha, depth_multiplier,
                              strides=(2, 2), block_id=4)
    x = _depthwise_conv_block(x, 256, alpha, depth_multiplier, block_id=5)

    x = _depthwise_conv_block(x, 512, alpha, depth_multiplier,
                              strides=(2, 2), block_id=6)
    x = _depthwise_conv_block(x, 512, alpha, depth_multiplier, block_id=7)

    x = _depthwise_conv_block(x, 512, alpha, depth_multiplier, block_id=8)

    x = _depthwise_conv_block(x, 512, alpha, depth_multiplier, block_id=9)

    x = _depthwise_conv_block(x, 512, alpha, depth_multiplier, block_id=10)

    x = _depthwise_conv_block(x, 512, alpha, depth_multiplier, block_id=11)

    # x = _depthwise_conv_block(x, 1024, alpha, depth_multiplier, strides=(2, 2), block_id=12)

    x = _depthwise_conv_block(x, 1024, alpha, depth_multiplier, block_id=12)

    x = layers.AveragePooling2D(pool_size=(5, 5), padding='valid')(mobilenet_feature)
    x = layers.Dropout(0.1, name='dropout')(x)
    x = layers.Conv2D(3, (1, 1),
                      padding='same',
                      use_bias=False,
                      strides=(1, 1),
                      name='dense')(x)
    x = layers.Reshape((3,), name='reshape')(x)
    x = keras.layers.Activation('softmax', name='softmax')(x)
    return x
感兴趣的可以对比一下官方提供的源代码,细心的可以发现我们移除了Padding、GlobalAveragePooing、Squeeze等。进行了如上修改以后,我们发现有一个softmax虽然NNAPI不支持,但是对于我们训练十分重要,那该怎么办呢?这正是我们接下来需要讨论的一个很重要的步骤,网络裁剪。
网络裁剪
上面我们介绍过,虽然NNAPI不支持Softmax,但是对于我们训练过程十分重要。所以我们在训练的时候不移除Softmax,我们考虑在训练好模型以后对整个graph进行裁剪,移除softmax operation。在移除softmax operation之前,我们要找到softmax operation之前的Node name。参看上述的代码我们可以知道,softmax之前的node name是dense/Conv2D。于是,我们借助tensorflow提供的工具toco就可以完成模型的裁剪。

有一件事情需要注意的是,因为你裁剪了softmax operation。所以你在tflite-android进行完一次前传以后,需要根据输出的结果,再进行一个softmax的操作。
tflite-android的业务代码
模型声明
private static final int PHONE_SIZE = 80;

private static final int PHONE_CHANNEL = 3;

private ByteBuffer phoneData_ = null;

float [][][][] phone_prob_;

private Interpreter litePhone_;
phoneData_ = ByteBuffer.allocateDirect(4 * PHONE_CHANNEL * PHONE_SIZE * PHONE_SIZE);

// 初始化tflite模型,使用NNAPI
String phoneModelName = "/sdcard/Algo/phone.tflite";
litePhone_ = new Interpreter(new File(phoneModelName));
litePhone_.setUseNNAPI(true);
预处理
    private void prepare_phone_input(Mat img) {
        Mat phone_input = new Mat();
        Imgproc.resize(img, phone_input, new Size(PHONE_SIZE, PHONE_SIZE));

        phone_input.convertTo(phone_input, CvType.CV_32F);
        Core.add(phone_input, new Scalar(-123.0), phone_input);
        Core.divide(phone_input, new Scalar(58.0), phone_input);

        float[] data_buff   = new float[(int)(phone_input.total() * phone_input.channels())];
        phone_input.get(0, 0, data_buff);

        phoneData_.rewind();
        for (int i = 0; i < PHONE_SIZE; i++) {
            for (int j = 0; j < PHONE_SIZE; j++) {
                for (int k = 0; k < PHONE_CHANNEL; k++) {
                    phoneData_.putFloat(data_buff[i * PHONE_SIZE + j]);
                }
            }
        }
    }
模型前传,注意我们在取出结果后,进行了一个简单的softmax操作。
    private void detect_phone(MonitorResults r) {
        Object[] inputs = new Object[]{phoneData_};

        Map<Integer, Object> map_indices_outputs = new HashMap<>();
        map_indices_outputs.put(0, phone_prob_);

        long startTime = SystemClock.uptimeMillis();
        litePhone_.runForMultipleInputsOutputs(inputs, map_indices_outputs);

        long endTime = SystemClock.uptimeMillis();

        float x0 = (float)(Math.exp(phone_prob_[0][0][0][0]));
        float x1 = (float)(Math.exp(phone_prob_[0][0][0][1]));
        float x2 = (float)(Math.exp(phone_prob_[0][0][0][2]));

        float ss = x0 + x1 + x2;

        r.left_phone_ = x1 / ss;
        r.right_phone_ = x2 / ss;
    }
结尾
至此,我们完成了如何在tflite-android中使用NNAPI来加速mobilenet分类器的推断。如果大家有想法或者问题,欢迎留言或私信。关于整体的android项目工程代码,后面我会上传到本人的Github中,同时同步到本文中。
参考
推荐阅读
专注嵌入式端的AI算法实现,欢迎关注作者微信公众号和知乎嵌入式AI算法实现专栏。
更多嵌入式AI相关的技术文章请关注极术嵌入式AI专栏。


