1.模型前期准备
下载tensorflow/model代码和rensnet50_v1模型,执行以下命令python3.5 exportinferencegraph.py --alsologtostderr --modelname=resnetv150 --imagesize=224 --labelsoffset=1 --outputfile=/mnt/data/models-1.13.0/research/slim/tmp/resnetv150_inf.pb
python3.5 freezegraph.py --inputgraph=/mnt/data/models-1.13.0/research/slim/tmp/resnetv150inf.pb --inputcheckpoint=/mnt/data/models-1.13.0/research/slim/tmp/resnetv1.ckpt --inputbinary=true --outputgraph=/mnt/data/models-1.13.0/research/slim/tmp/resnetv150frozen.pb --outputnodenames= resnetv150/predictions/Reshape_1
2.准备矫正数据集
这里使用demo数据集
3.编辑NN compiler配置文件
3.1编译
`[Common]
mode=build
[Parser]
model_name = resnet_50
detection_postprocess =
model_domain = image_classification
output = resnet_v1_50/predictions/Reshape_1
input_model = ./resnet_50_model/resnet_v1_50_frozen.pb
input = input
input_shape = [1,224,224,3]
output_dir = ./
[AutoQuantizationTool]
model_name = resnet_50
quantize_method = SYMMETRIC
ops_per_channel = DepthwiseConv
calibration_data = ./dataset/dataset.npy
calibration_label = ./dataset/label.npy
preprocess_mode = normalize
quant_precision=int8
reverse_rgb = False
label_id_offset = 0
[GBuilder]
target=Z1_0701
outputs=./resnet_50_model/aipu_resnet_50.bin
profile= True`
3.2编译结果输出
3.3 生成仿真输入文件
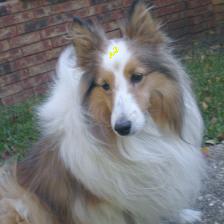
输入图片
`from PIL import Image
from matplotlib import pyplot as plt
import numpy as np
input_height=224
input_width=224
input_channel = 3
mean = [127.5, 127.5, 127.5]
var = 1
img_name = "1.jpeg"
img = Image.open(img_name)
plt.imshow(img)
img_w, img_h = img.size
if img_w/img_h > input_width/input_height :
tmp_h = input_height
tmp_w = int(input_height/img_h*img_w)
oft_y = 0
oft_x = (tmp_w-input_width)/2
else:
tmp_w = input_width
tmp_h = int(input_width/img_w*img_h)
oft_x = 0
oft_y = (tmp_h-input_height)/2
img1 = img.resize((tmp_w, tmp_h),Image.ANTIALIAS)
plt.imshow(img1)
img2 = img1.crop((oft_x,oft_y,oft_x+input_width,oft_y+input_height))
plt.imshow(img2)
img_arr = (np.array(img2)-mean)/var
img_arr=img_arr.astype(np.int8)
import struct
data=b''
for y in range(img_arr.shape[1]):
for x in range(img_arr.shape[0]):
    data += struct.pack('bbb',img_arr[y,x,0],img_arr[y,x,1],img_arr[y,x,2])
fw = open("input.bin", "wb")
fw.write(data)
fw.close()
print("save to input.bin OK")`
3.4.生成仿真文件
`[Common]
mode=run
[Parser]
model_name = resnet_50
detection_postprocess =
model_domain = image_classification
output = resnet_v1_50/predictions/Reshape_1
input_model = ./resnet_50_model/resnet_v1_50_frozen.pb
input = input
input_shape = [1,224,224,3]
output_dir =./
[AutoQuantizationTool]
model_name = resnet_50
quantize_method = SYMMETRIC
ops_per_channel = DepthwiseConv
calibration_data = ./dataset/dataset.npy
calibration_label = ./dataset/label.npy
preprocess_mode = normalize
quant_precision=int8
reverse_rgb = False
label_id_offset = 0
[GBuilder]
inputs=./resnet_50_model/input.bin
outputs=output_resnet_50.bin
simulator=aipu_simulator_z1
profile= True
target=Z1_0701`
4.输出结果
4.1 输入图片预测
`import numpy as np
outputfile = './output_resnet_50.bin'
npyoutput = np.fromfile(outputfile, dtype=np.int8)
outputclass = npyoutput.argmax()
print("Predict Class is %d"%outputclass)`
4.2 比较运算量化误差
预测230,输出结果是正确的.


