1. 模型转换
按照R329教程一|周易 AIPU 部署及仿真教程将tensorflow的模型转换成pb模型。这里对resnet50进行转换,转换后的模型在附件一的百度网盘。
2. 矫正数据集
这里我们是针对imagenet分类的模型进行量化的。我们量化矫正的数据集采用imagenet_1k.zip,然后将数据制作成npy文件。制作好的npy文件在附件一的百度网盘。
3. NN compiler的cfg文件
这里我们因为是在docker中进行仿真测试的,所以我们采用run的模式,具体的配置如下。需要根据模型,数据的位置进行修改。
resnet50_run.cfg
[Common]
mode=run

[Parser]
model_name = resnet_50
detection_postprocess =
model_domain = image_classification
output = resnet_v1_50/predictions/Reshape_1
input_model = ./model/resnet_v1_50_frozen.pb
input = input
input_shape = [1,224,224,3]
output_dir = ./

[AutoQuantizationTool]
model_name = resnet_50
quantize_method = SYMMETRIC
ops_per_channel = DepthwiseConv
calibration_data = ./dataset/dataset1000.npy
calibration_label = ./dataset/label1000.npy
preprocess_mode = normalize
quant_precision=int8
reverse_rgb = False
label_id_offset = 0

[GBuilder]
inputs=./output/input.bin
outputs=./output/output_resnet_50.bin
simulator=aipu_simulator_z1
profile= True
target=Z1_0701
4. simulator执行的输入输出结果,比较运算量化误差
准备好:
- pb模型
- 校准数据集
- cfg配置文件
这三样东西后,就可以用docker cp ./folder $name:path命令,将所有的文件拷贝到docker容器中。我拷贝到docker容器中截图:
接下来,就可以进行模型的量化和验证了。直接使用如下命令
aipubuild config/resnet50_run.cfg运行之后得到在output文件夹下得到output_resnet_50.bin,使用 quant_val.py进行解析:
root@a721d8d4db47:~/demos/2_resnet50# python demo/quan_val.py
predict first 5 label:
    index  230, prob 205, name: Old English sheepdog, bobtail
    index  231, prob  48, name: Shetland sheepdog, Shetland sheep dog, Shetland
    index  999, prob   0, name: ear, spike, capitulum
    index  342, prob   0, name: hog, pig, grunter, squealer, Sus scrofa
    index  340, prob   0, name: sorrel
true first 5 label:
    index  232, prob  83, name: collie
    index  231, prob  83, name: Shetland sheepdog, Shetland sheep dog, Shetland
    index  158, prob  41, name: papillon
    index  170, prob  40, name: borzoi, Russian wolfhound
    index  161, prob  39, name: Afghan hound, Afghan
Detect picture save to result.jpeg

***************** TOP 1 result ***************
Predict Class is 231
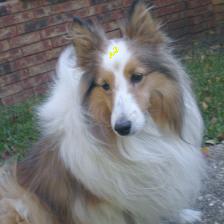
True Class is 231可以看到都是231是最大可能的类别。
测试时的图片是:


