Github地址:https://github.com/jizhishutong/YOLOU
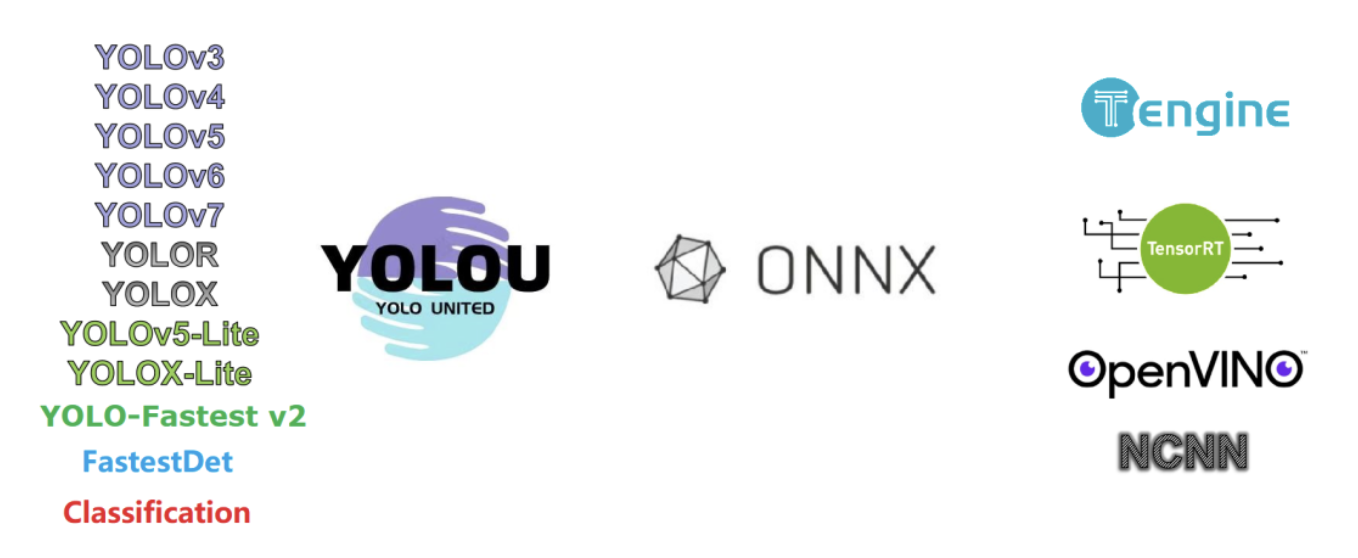
YOLOU是一个集成YOLOv3、YOLOv4、YOLOv5、YOLOv6、YOLOv7、YOLOX以及YOLOR的YOLO系列目标检测算法库,对于轻量化目标检测同时也集成了YOLOv3-Tiny、YOLOv4-Tiny、YOLO-Fastest V2、FastestDet、YOLOv5-Lite以及YOLOX-Lite。
对于实际工程和遇到的问题也会进行一定实践经验的植入,诸如针对小目标检测问题集成了YOLOv5的改进版本——YOLOv5-SPD模型,以及解决域迁移问题的LF-YOLO模型等等。
为了方便大家能够产学研相结合,能够讲有用的思想和改进落地,这里也会进行实际落地的集成,目前已经开源的模型均可一键转换到ONNX文件进行各个推理框架的部署,目前在测试阶段的有TensorRT、NCNN、OpenVINO以及Tengine推理框架,近期均会开源。
为了大家在实际使用中能够尽可能实现自己的想法,YOLOU还集成了众多注意力模块以及困难任务的模型模块。目前支持和即将支持的模块如下:
对于实际过程落地问题所集成的模块
- 小目标问题模块:SPD-Conv、TPH-YOLO、YOLO-SlimNeck、NWD-Base Metric、YOLO-SAHI(测试完成)
- 域迁移问题模块:YOLO-SA、DAYOLO(测试完成)
- 恶劣天气问题模块:LF-YOLO(测试完成)
针对注意力模块
- Self Attention
- Involution
- CARAFE
- Bottleneck Transformer
- SK Attention
- CBAM Attention
- SE Attention
- Coordinate attention
- Channel Attention Module
- Spatial Attention Module
- Coordinate attention
- GAM Attention
- Global Window Attention
- SwinTransformer Block
- 等等
空间金字塔池化结构
- SPP
- SPPF
- ASPP
- RFB
- SPPCSPC
- GhostSPPCSPC
- SPP_FastestDet
- 等等
对于重参结构
这里不仅仅支持离线架构重参,还支持在线结构化重参:
- RepVGG
- DBB
- ACNet
- OREPA
- DyReP
- 等等
如何在YOLOU中构建超轻量化模型?
这里就给大家示意一下如何在YOLOU中添加YOLO-Fastest V2模型,实现超轻量化的YOLO系列算法,让YOLO在ARM端也能实时检测。
1、 YOLO-Fastest V2 模型框架的基本结构
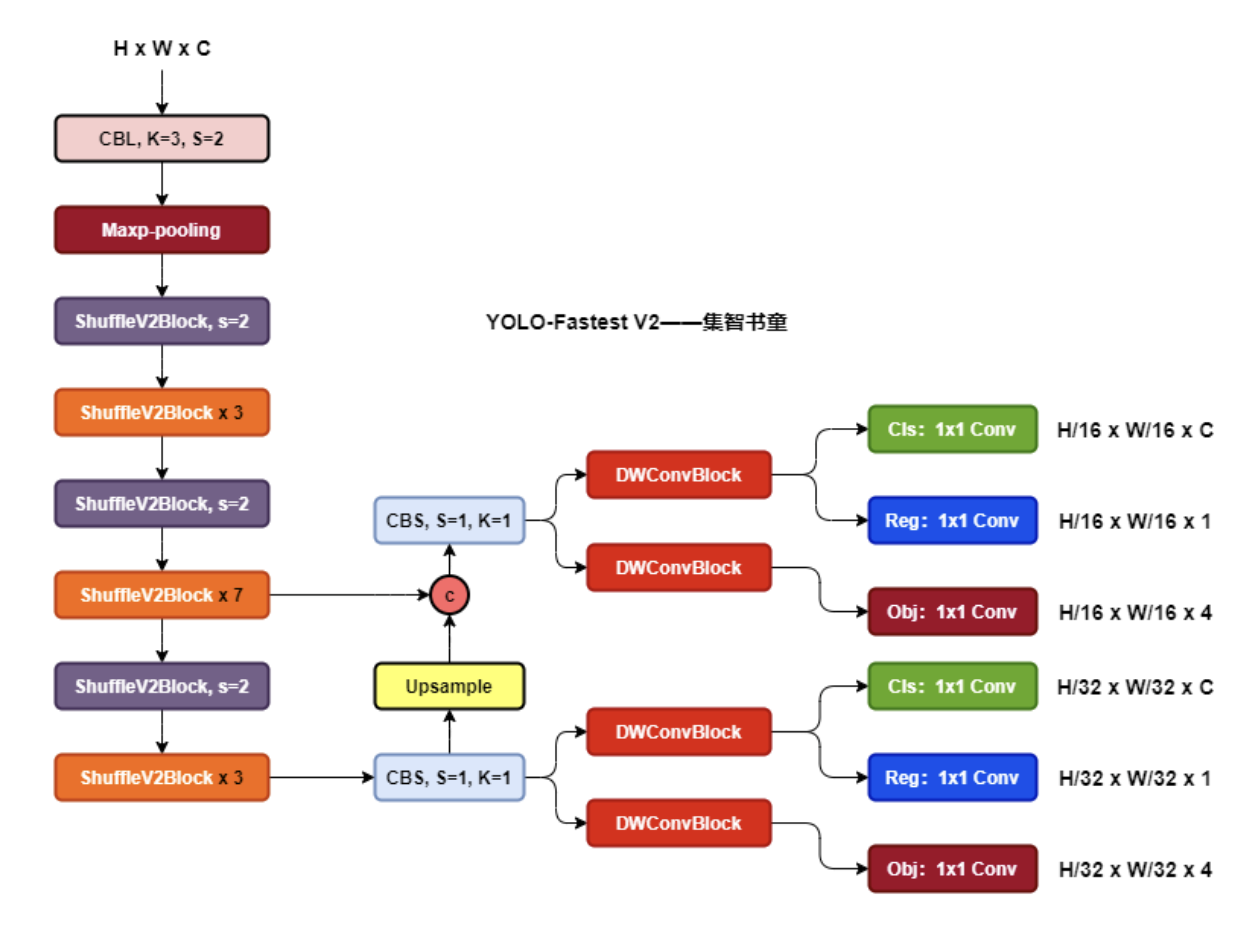
首先第一步便是对于所搭建模型的整体架构的了解,这里笔者给大家把YOLO-Fastest v2的整体架构图绘制出来了,如果你对于YOLOU足够了解,你便知道如下图所示,YOLO-Fastest V2整个框架也是由Backbone+Neck+Head的基本范式进行的搭建,其中主要用到的模块有,ShuffleV2Block、CBS(Conv+BN+SiLU)、Upsample以及DWConvBlock。
下面便是基于前面的网络架构图进行搭建的YAML文件,具体实验大家可以去YOLOU的github进行尝试和实验。
`backbone:
  # [from, number, module, args]
  [[-1, 1, SimConv, [24, 3, 2]],  # 0-P1/2
   [-1, 1, nn.MaxPool2d, [24, 3, 2, 1]],  # 1-P2/4
   [-1, 4, ShuffleNetV2x, [48, 3, 2]], #stage2/8
   [-1, 8, ShuffleNetV2x, [96, 3, 2]], # 3- stage3/16 C2
   [-1, 4, ShuffleNetV2x, [192, 3, 2]], # 4- stage4/32 C3
  ]

# YOLO-Fastest v6.0 head
head:
  [[-1, 1, SimConv, [72, 1, 1]], #5-S3
   [-1, 1, DWConvblockX, [72, 5]], #6-cls_3, obj_3
   [5, 1, DWConvblockX, [72, 5]],  #7-reg_3

   [4, 1, nn.Upsample, [None, 2, 'nearest']],
   [[-1, 3], 1, Concat, [1]],  # p2
   [-1, 1, SimConv, [72, 1, 1]],  # 10-S2
   [-1, 1, DWConvblockX, [72, 5]], #11-cls_2, obj_2
   [10, 1, DWConvblockX, [72, 5]], #12-reg_2

   [[12, 11, 7, 6], 1, DetectFaster, [nc, anchors]],  # Detect(P3, P4, P5)
  ]
`
这里可以看出模型的主干为ShuffleNet V2。与原始主干相比,内存访问减少且更轻。其次,Anchor的匹配机制指的是YOLOV5,它实际上是Yolov 5和Darknet的官方版本。
下一步是检测头的解耦。这也是对YoloX的参考。它将返回检测帧并对前景和背景进行分类。检测类别的分类将Yolo的特征图耦合到3个不同的特征图中,其中前景背景的分类和检测类别的归类共享相同的网络分支参数。
最后,用Softmax代替检测损失类别分类。
顺便说一句,作者只用2个尺度的检测头输出11×11和22×22进行检测输出,因为原始作者使用3个检测头(11×11、22×22、44×44)和2个检测头的精度在coco中没有太大差异。
作者认为的原因如下:
- 主干对应于44×44分辨率的特征图太少;
- 正archors和负archors严重失衡;
- 小目标是困难的样本,需要很高的模型学习能力;
因此,YOLO-Fastest v2不仅应该关注耗时的模型推理,还应该关注模型推理所消耗的系统资源、内存和CPU使用。例如,两种型号的CPU都可以达到30fps,但在单核实时的情况下,CPU仅占型号A的20%。当4个内核完全打开时,B型可以实现实时性。CPU使用率可能为100%,但B型性能可能更好。在这种情况下,需要权衡利弊。
下面是官方的精度和不同模型的对比,可以看到还是很香的!
2、Detect.py的修改
这里修改的目的主要是为了迎合onnx的导出,以方便onnx在不同推理框架的部署,这里我们了解Yolo-v5和YOLO-Fastest v2的朋友应该知道,其对于样本的分配以及Anchor的机制基本没对YOLOV5进行修改,但是YOLO-Fastest v2终究是没有基于YOLOV5进行搭建,因此集成的过程中会遇到导出onnx时加入grid过程中产生很多不规范的op,因此这里也进行了修改。
原始YOLO-Fastest v2的检测头搭建如下:
`class Detector(nn.Module):
    def __init__(self, classes, anchor_num, load_param, export_onnx = False):
        super(Detector, self).__init__()
        out_depth = 72
        stage_out_channels = [-1, 24, 48, 96, 192]

        self.export_onnx = export_onnx
        self.backbone = ShuffleNetV2(stage_out_channels, load_param)
        self.fpn = LightFPN(stage_out_channels[-2] + stage_out_channels[-1], stage_out_channels[-1], out_depth)

        self.output_reg_layers = nn.Conv2d(out_depth, 4 * anchor_num, 1, 1, 0, bias=True)
        self.output_obj_layers = nn.Conv2d(out_depth, anchor_num, 1, 1, 0, bias=True)
        self.output_cls_layers = nn.Conv2d(out_depth, classes, 1, 1, 0, bias=True)

    def forward(self, x):
        C2, C3 = self.backbone(x)
        cls_2, obj_2, reg_2, cls_3, obj_3, reg_3 = self.fpn(C2, C3)

        out_reg_2 = self.output_reg_layers(reg_2)
        out_obj_2 = self.output_obj_layers(obj_2)
        out_cls_2 = self.output_cls_layers(cls_2)

        out_reg_3 = self.output_reg_layers(reg_3)
        out_obj_3 = self.output_obj_layers(obj_3)
        out_cls_3 = self.output_cls_layers(cls_3)

        if self.export_onnx:
            out_reg_2 = out_reg_2.sigmoid()
            out_obj_2 = out_obj_2.sigmoid()
            out_cls_2 = F.softmax(out_cls_2, dim = 1)

            out_reg_3 = out_reg_3.sigmoid()
            out_obj_3 = out_obj_3.sigmoid()
            out_cls_3 = F.softmax(out_cls_3, dim = 1)

            print("export onnx ...")
            return torch.cat((out_reg_2, out_obj_2, out_cls_2), 1).permute(0, 2, 3, 1), \
                   torch.cat((out_reg_3, out_obj_3, out_cls_3), 1).permute(0, 2, 3, 1)

        else:
            return out_reg_2, out_obj_2, out_cls_2, out_reg_3, out_obj_3, out_cls_3
`
具体修改如下:
`class DetectFaster(nn.Module):
    onnx_dynamic = False  # ONNX export parameter
    export = False  # export mode

    def __init__(self, num_classes, anchors=(), in_channels=(72, 72, 72, 72), inplace=True, prior_prob=1e-2):
        super(DetectFaster, self).__init__()
        out_depth = 72
        self.num_classes = num_classes
        self.nc = self.num_classes
        self.no = self.nc + 5  # number of outputs per anchor
        self.nl = len(anchors)  # number of detection layers
        self.grid = [torch.zeros(1)] * self.nl  # init grid
        self.anchor_grid = [torch.zeros(1)] * self.nl  # init anchor grid
        self.na = len(anchors[0]) // 2  # number of anchors
        self.output_reg_layers = nn.Conv2d(out_depth, 4 * self.na, 1, 1, 0)
        self.output_obj_layers = nn.Conv2d(out_depth, self.na, 1, 1, 0)
        self.output_cls_layers = nn.Conv2d(out_depth, self.nc, 1, 1, 0)
        self.inplace = inplace
        self.m = nn.ModuleList([self.output_reg_layers, self.output_obj_layers, self.output_cls_layers])
        self.register_buffer('anchors', torch.tensor(anchors).float().view(self.nl, -1, 2))
        self.prior_prob = prior_prob
        self.layer_index = [0, 0, 0, 1, 1, 1]

    def initialize_biases(self):
        for _, module in self.named_modules():
            if isinstance(module, nn.Conv2d):
                if module.bias is not None:
                    init.constant_(module.bias, 0)

    def forward(self, xin):
        preds = [xin[0], xin[1], xin[1], xin[2], xin[3], xin[3]]
        for i in range(self.nl):
            preds[i * 3] = self.m[0](preds[i * 3])
            preds[(i * 3) + 1] = self.m[1](preds[(i * 3) + 1])
            preds[(i * 3) + 2] = self.m[2](preds[(i * 3) + 2])

        if self.training:
            return preds[0], preds[1], preds[2], preds[3], preds[4], preds[5]

        else:
            z = []
            for i in range(self.nl):
                bs, _, h, w = preds[i * 3].shape
                if self.export:
                    bs = -1
                reg_preds = preds[i * 3].view(bs, self.na, 4, h, w).sigmoid()
                obj_preds = preds[(i * 3) + 1].view(bs, self.na, 1, h, w).sigmoid()
                cls_preds = preds[(i * 3) + 2].view(bs, 1, self.nc, h, w).repeat(1, 3, 1, 1, 1)
                cls_preds = F.softmax(cls_preds, dim=2)
                x = torch.cat([reg_preds, obj_preds, cls_preds], 2)
                y = x.view(bs, self.na, self.no, h, w).permute(0, 1, 3, 4, 2).contiguous()
                if self.onnx_dynamic or self.grid[i].shape[2:4] != x.shape[2:4]:
                    self.grid[i], self.anchor_grid[i] = self._make_grid(w, h, i)

                if self.inplace:
                    y[..., 0:2] = (y[..., 0:2] * 2 + self.grid[i]) * self.stride[i * 3]  # xy
                    y[..., 2:4] = (y[..., 2:4] * 2) ** 2 * self.anchor_grid[i]  # wh
                else:
                    xy, wh, conf = y.split((2, 2, self.nc + 1), 4)  # y.tensor_split((2, 4, 5), 4)  # torch 1.8.0
                    xy = (xy * 2 + self.grid[i]) * self.stride[i * 3]  # xy
                    wh = (wh * 2) ** 2 * self.anchor_grid[i]  # wh
                    y = torch.cat((xy, wh, conf), 4)
                z.append(y.view(bs, -1, self.no))
                output = torch.cat(z, 1)

            return (output,)
`
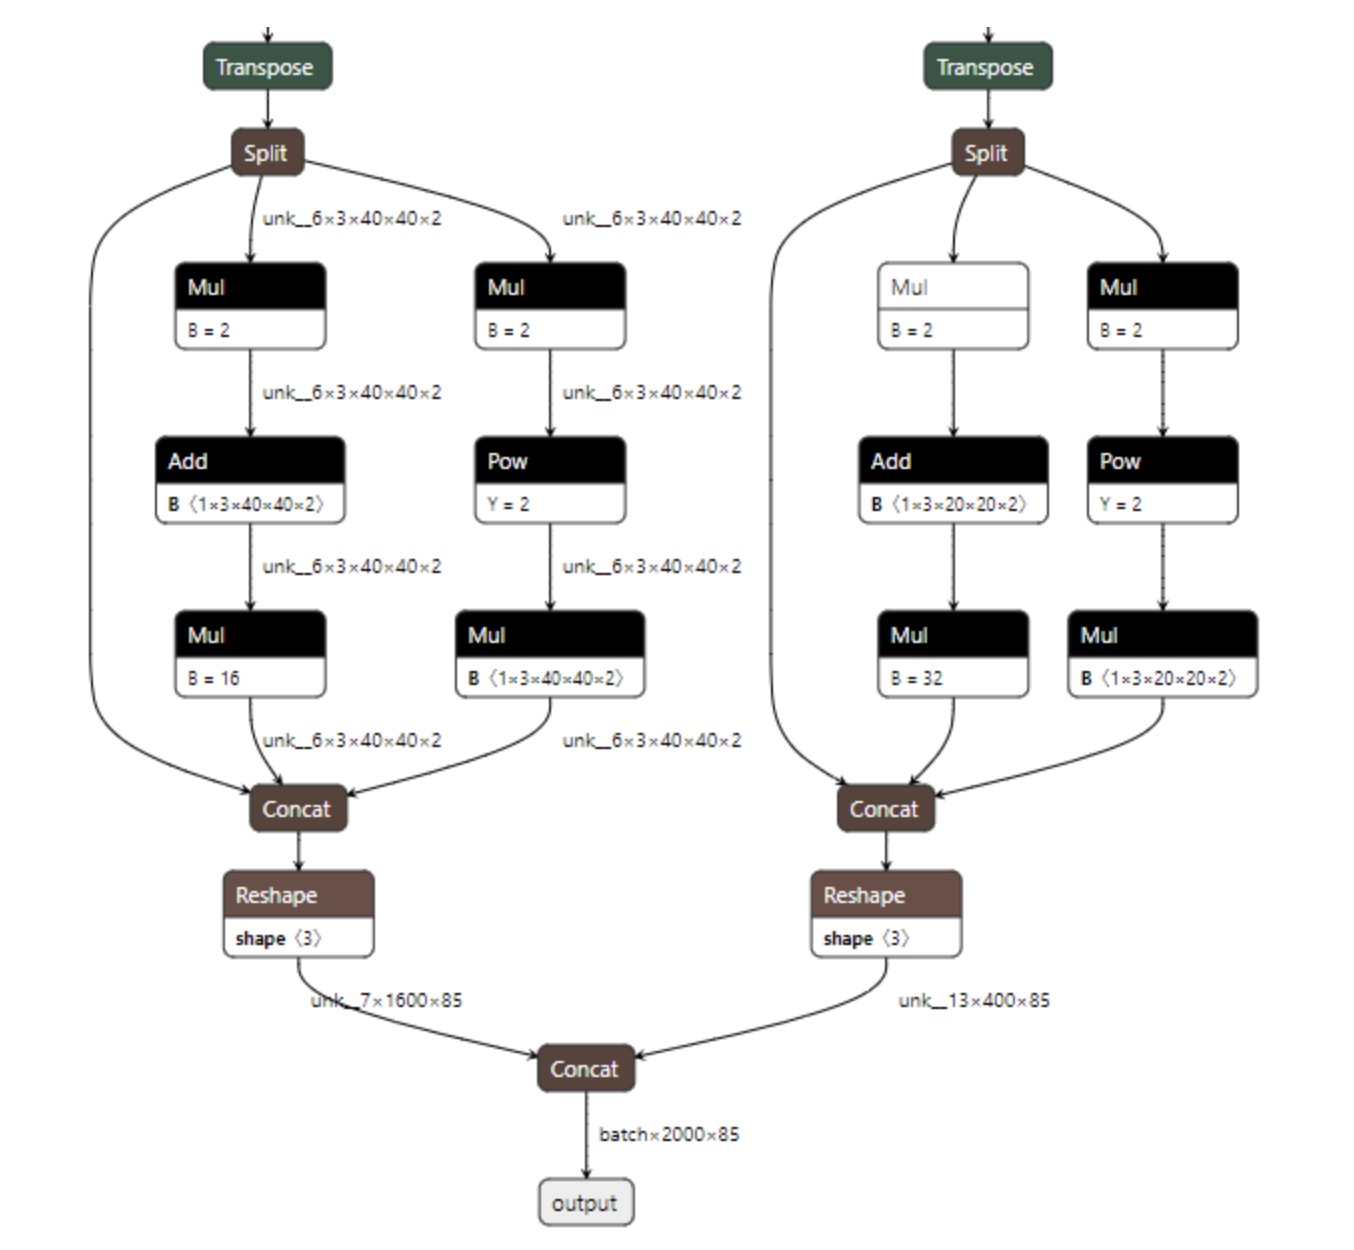
具体导出的ONNX文件如下所示:
这样便得到了比较规范的onnx,同时也将bbox的解码放入onnx文件,进一步简化了后处理的步骤,也降低了落地的难度。
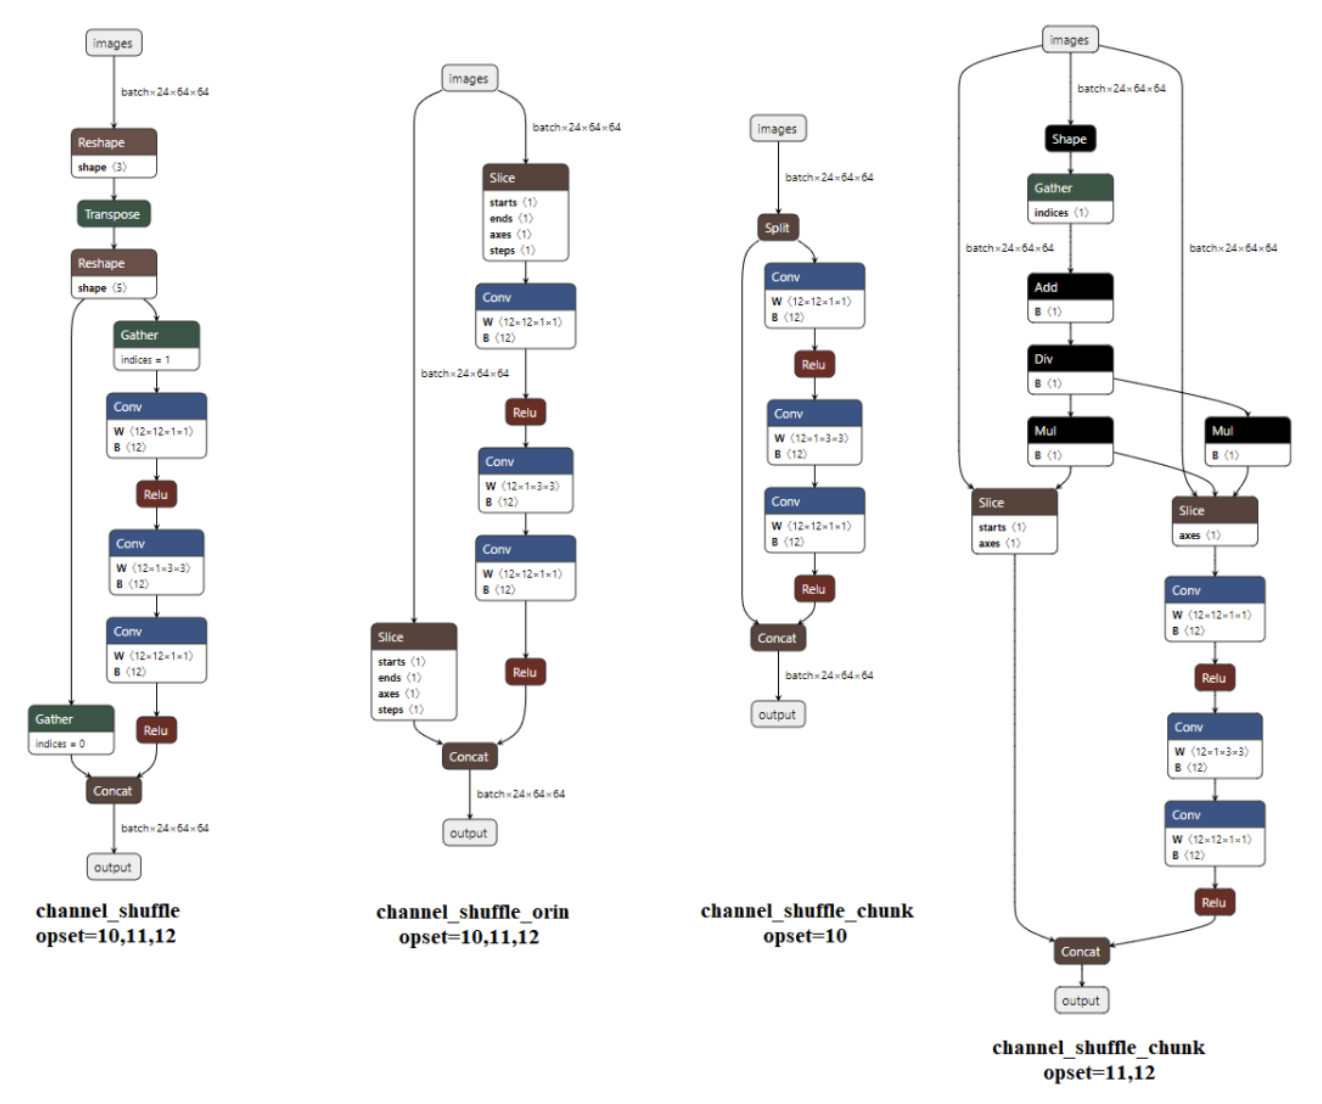
3、如何得到更为美观优雅的ONNX文件?
Gather问题的消除可以参见下面的ONNX输出,具体实现可以参见YOLOU的开源代码!
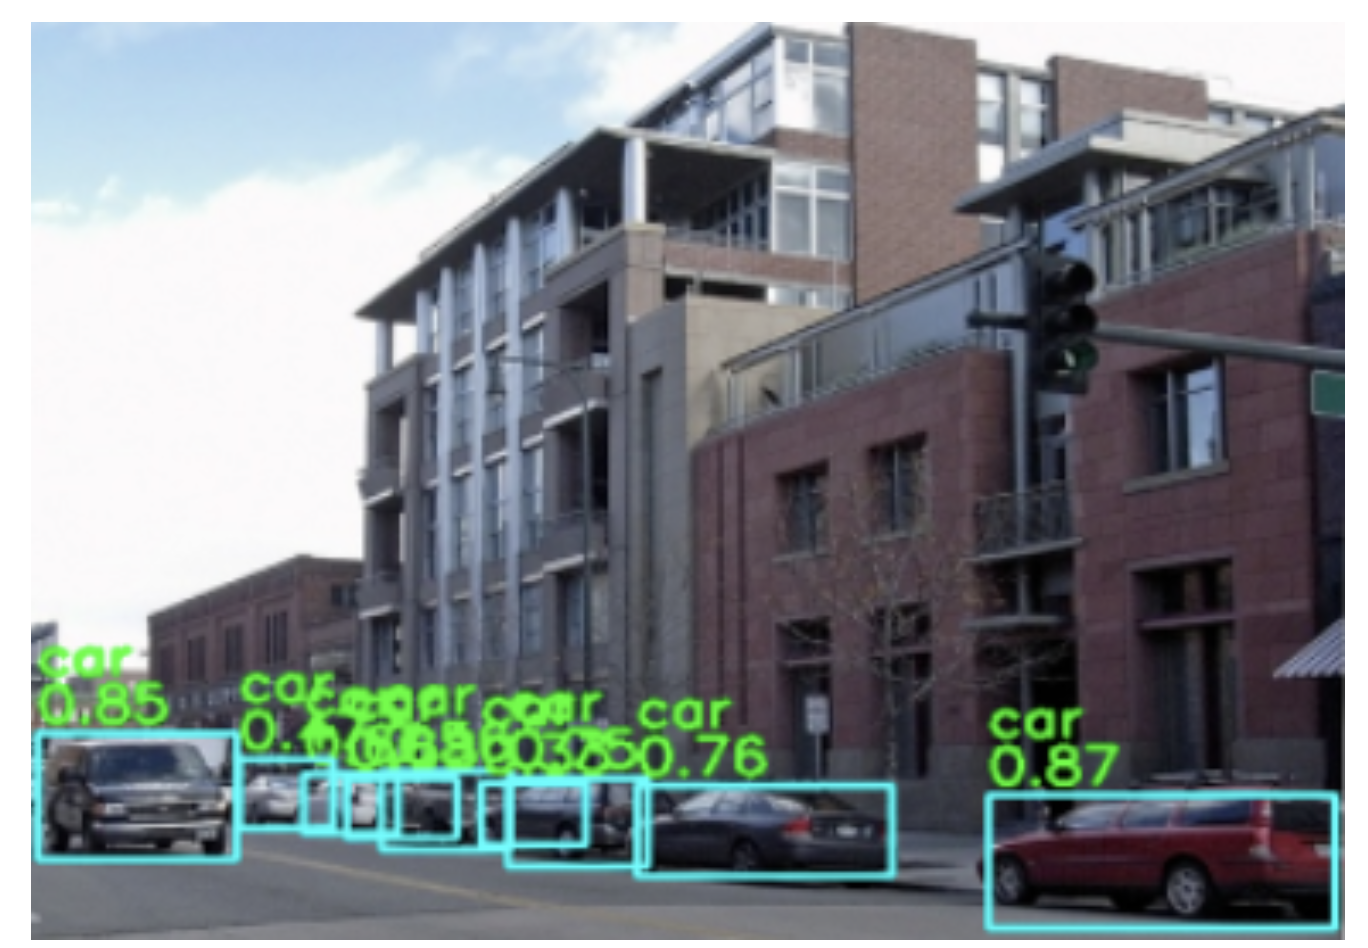
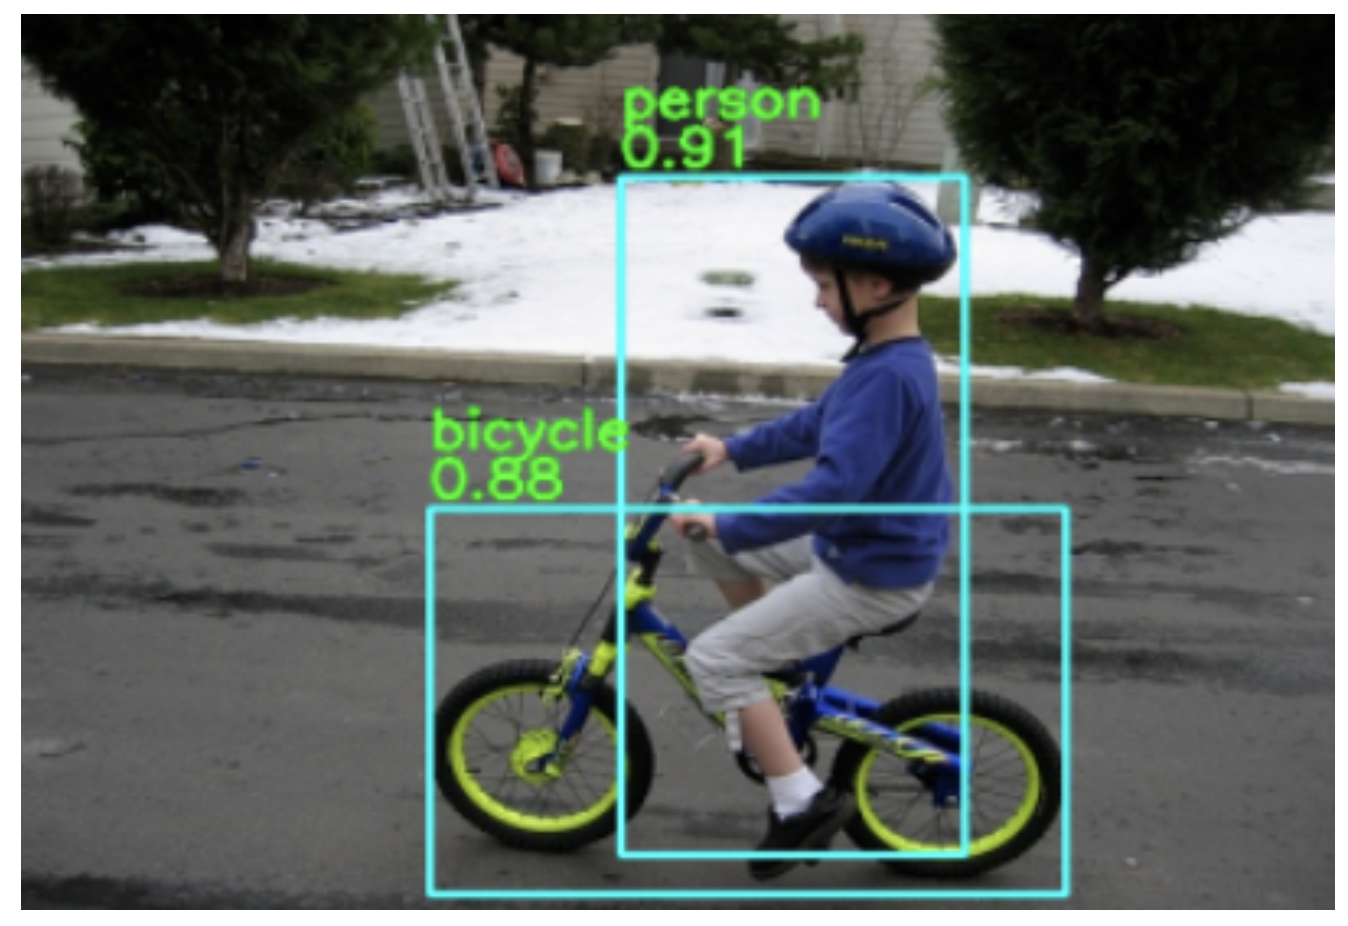
4、检测结果如下
作者:ChaucerG
文章来源:集智书童
推荐阅读
- 利用Transformer和Voxel Query让Point与Voxel更好结合成就3D检测
- 阿里巴巴提出YOLOX-PAI,1ms内精度无敌,超越YOLOv6、PP-YOLOE
- 全新高性能 FPN | ssFPN 教您如何修改 FPN 让大小目标在目标检测中都有提升!!!
更多人工智能干货请关注 嵌入式AI 专栏。欢迎添加极术小姐姐微信(id:aijishu20)加入技术交流群,请备注研究方向。

